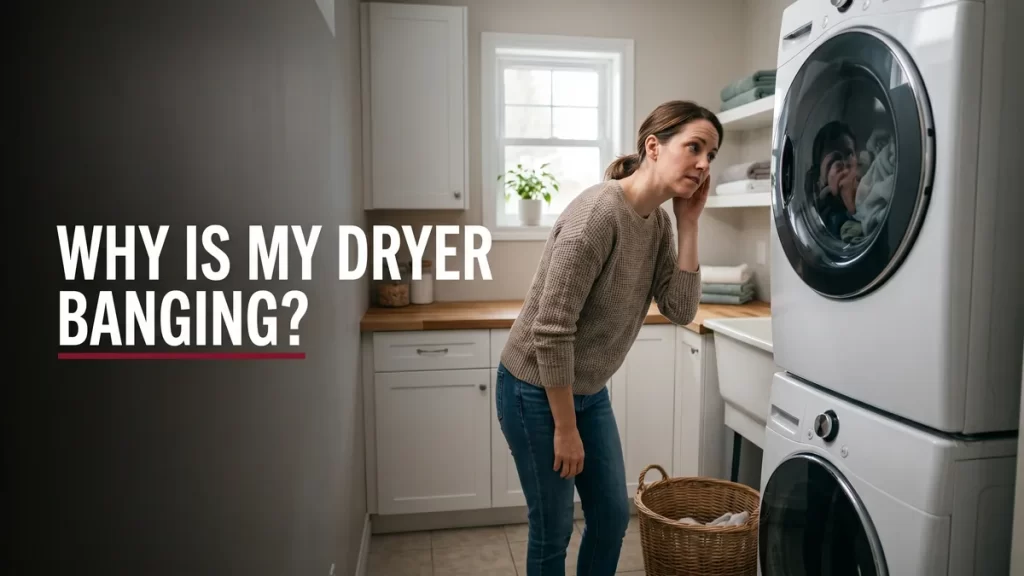
It usually starts in the middle of a load. A steady hum turns into a heavy thud, thud, thud that you can hear from the next room, and suddenly the whole laundry area is shaking. A dryer making a loud banging noise is one of the most common calls we get from Halifax homes, and the good news is that the sound itself is a clue. The bang almost always points to a specific worn part, and once you know which one, you know whether this is a quick fix or a job for a technician. If the noise has already turned into grinding or burning smells, skip ahead and book dryer repair in Halifax rather than running another load.
This guide walks through what a banging dryer is actually telling you in 2026, which causes you can safely check yourself, and where the line is between a do-it-yourself afternoon and a service call. We will keep it practical and Halifax-specific, because salt air and older HRM laundry rooms add a few wrinkles that the generic videos online never mention.
In this article
What a banging noise actually means
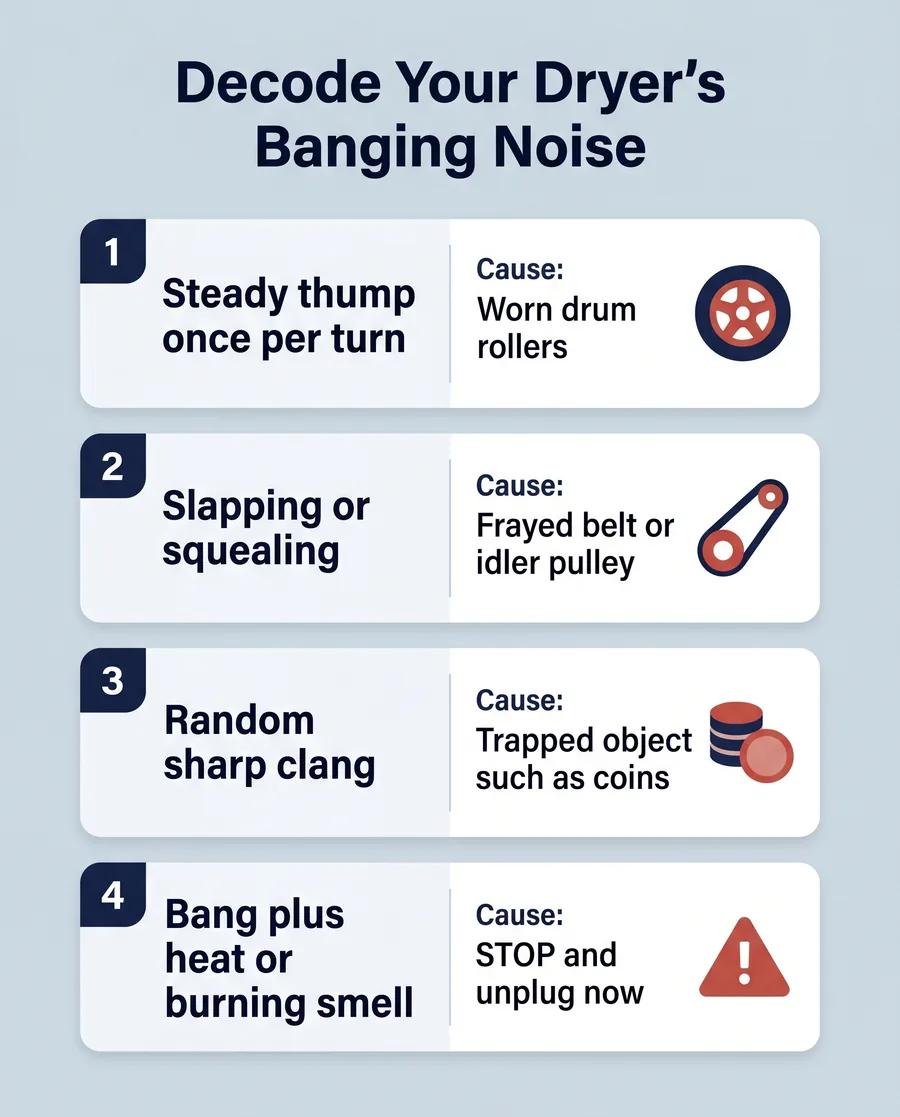
A dryer drum is a big metal cylinder that spins on a system of rollers, glides, and a belt, all driven by a motor. When every part is healthy, the drum turns smoothly and you hear a soft, even tumble. A bang is the sound of something interrupting that rotation: a flat spot on a roller, a worn glide letting the drum drop, or an object trapped where it should not be. The rhythm tells you a lot. A bang that repeats once per drum rotation is mechanical and predictable, while a random clatter is usually something loose tumbling around.
So before you assume the worst, listen for the pattern. Take everything out and run the dryer empty for ten seconds. If the bang is still there, the problem is inside the machine. If it disappears, the culprit was in the laundry.
Stop the dryer if you smell burning or see smoke
A banging noise paired with a hot, burning, or rubbery smell is not a wait-and-see situation. Lint is highly flammable, and a seized drum or failing motor can overheat fast. Turn the dryer off at the wall, unplug it if you safely can, and do not run it again until it has been inspected. Clothes dryers are a recognized cause of home fires, and the warning signs are almost always heat and noise together.
The most common causes of a banging dryer
After years of service calls across the HRM, the same short list explains the vast majority of banging dryers. Here they are, roughly in order of how often we see them:
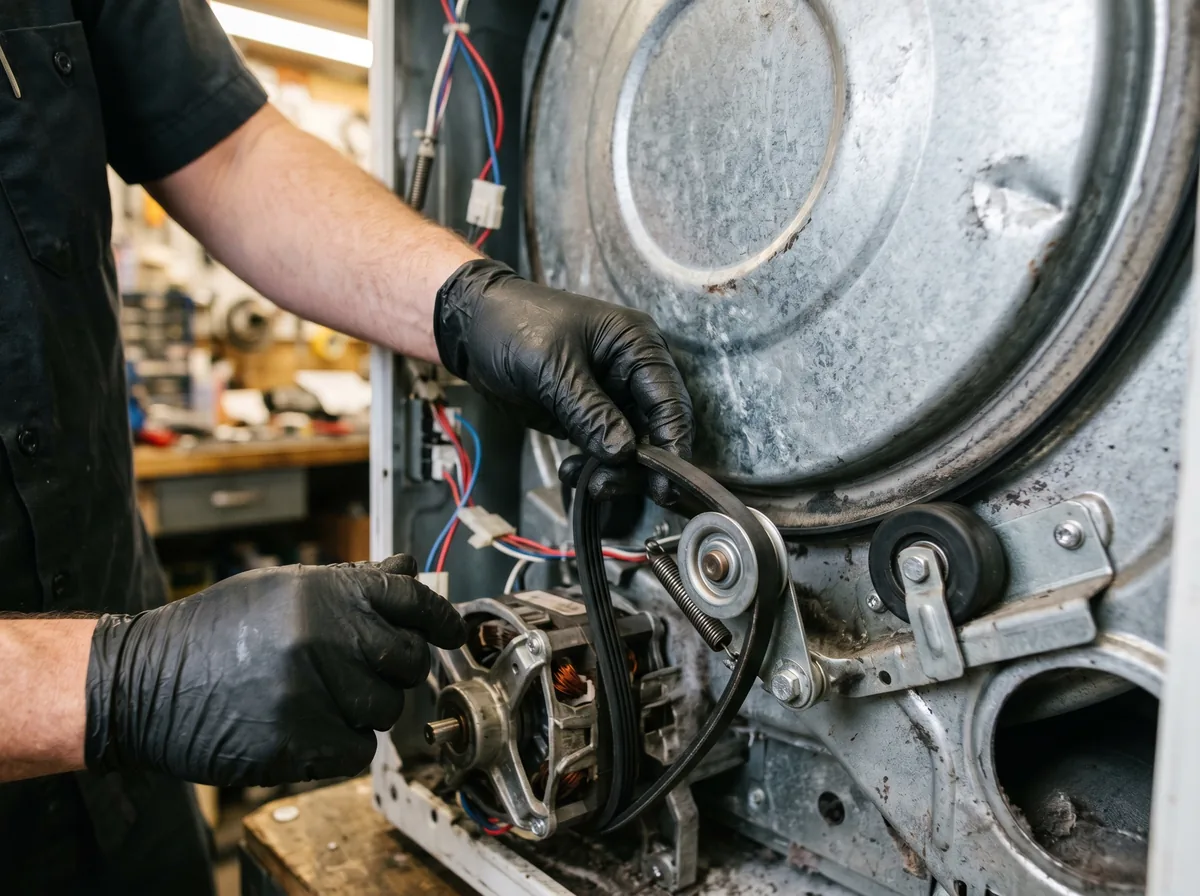
- Worn drum rollers (support rollers). These small wheels carry the drum. Over time they develop flat spots or the bearings dry out, so each rotation drops the drum slightly and you hear a thump. This is the number one cause we find.
- A worn or shredded drum belt. The belt wraps the drum and the motor pulley. As it frays, lumps and tears slap against the drum and cabinet with every turn.
- Failing idler pulley or tensioner. This keeps the belt tight. When its bearing wears, it squeals, then bangs as it wobbles.
- Worn drum glides or bearings. Front glides and the rear drum bearing keep the drum centred. When they wear, the drum shifts and knocks against the housing.
- Loose or off-balance load. A bunched-up duvet or a single heavy towel can thump like a machine fault, especially in compact stacked units.
- Foreign objects. Coins, zippers, underwire, or a stray screw caught in the drum seam or the lint area produce a sharp, irregular clang.
People often ask: can I keep using a dryer that bangs?
You can run a single short load to confirm the symptom, but you should not keep using a dryer that bangs load after load. A worn roller or belt that is left alone will eventually fail completely, and a seized drum can damage the motor, which turns a fifty-dollar part into a much bigger repair. More importantly, the same wear that causes noise often restricts airflow and traps lint, which raises the fire risk. Treat a persistent bang as a deadline, not a suggestion.
Checks you can safely do yourself
Safety note: The tips here are for general guidance only. Max Appliance Repair Halifax is not responsible for any damage, injury, or cost resulting from action taken based on this content. Always unplug an appliance or switch off its breaker before you inspect it. Anything involving a gas line or a gas appliance (such as a gas dryer) must be handled by a licensed gas technician, and any wiring you are not certain about by a licensed electrician. If a step calls for tools, dismantling, or work you are not fully comfortable with, stop and call a qualified technician.
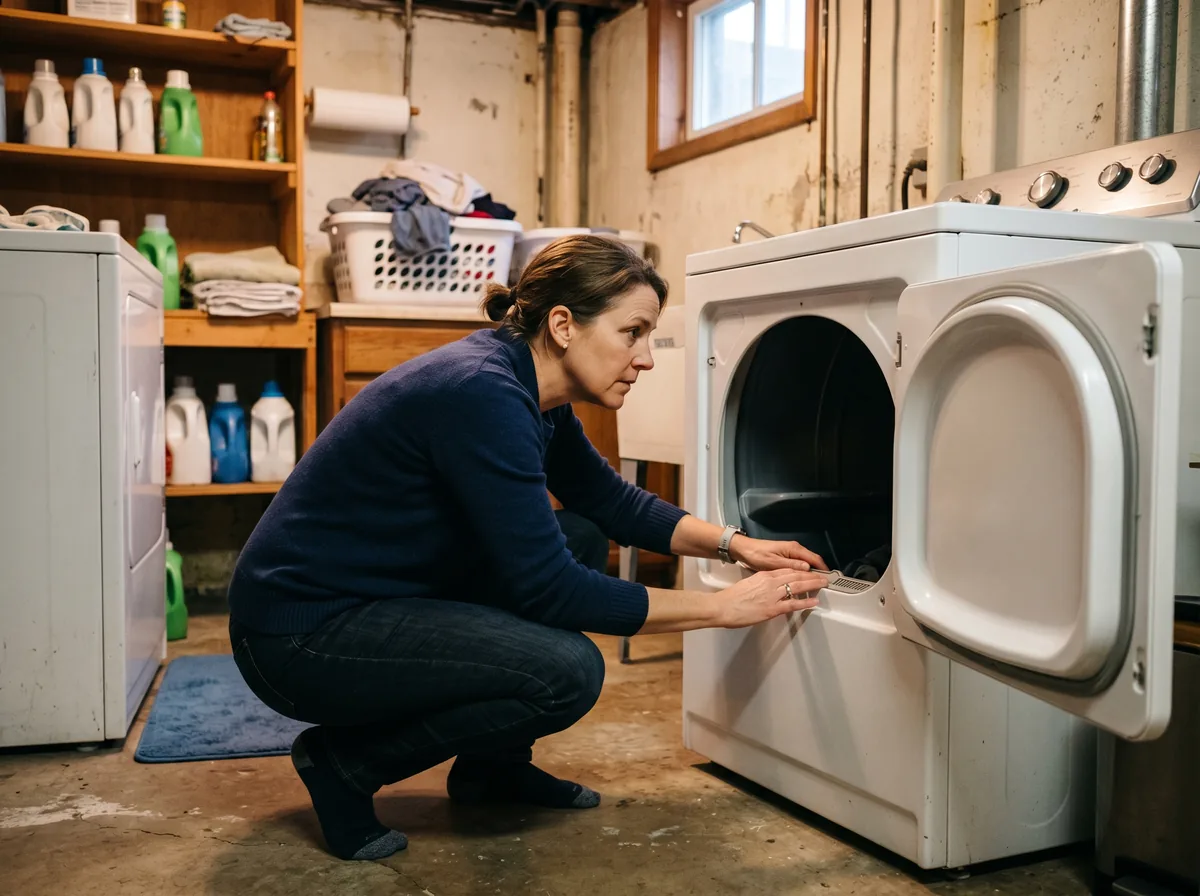
You do not need to take the dryer apart to narrow down the problem. A few simple, no-tools checks rule out the easy causes and tell you whether you are looking at a five-minute fix or a service call. Always unplug an electric dryer first, or switch off its breaker, before you reach inside.
- Empty the drum and run it. If the bang vanishes, you had an off-balance load or a trapped item. Problem solved.
- Check the lint trap and the seam. Pull the lint screen, shine a light into the slot, and feel around the rubber drum seal for coins or hardware.
- Level the machine. A dryer that rocks on an uneven HRM basement floor will bang under load. Adjust the feet so it sits dead solid.
- Listen for the rhythm. One thump per rotation usually means a roller or glide. A slapping or squealing sound leans toward the belt or idler pulley.
Pro tip: the spin-by-hand test
With the dryer unplugged and the front or top panel off, give the drum a slow spin by hand. A healthy drum turns quietly and freely. If you feel a catch, hear a grind, or see the drum dip at one point in the rotation, you have found your worn roller or glide without ever running the motor. If you are not comfortable opening the cabinet, that is completely fine, and it is exactly where most people hand the job to a technician.
When to stop and call a technician
Some banging dryers are a tidy do-it-yourself job. Others are not worth the risk or the time, especially once you factor in sourcing the right part for your exact model. Call a professional when:
- The noise comes with heat, a burning smell, or any sign of smoke.
- The drum will not turn freely by hand, which points to a seized bearing or motor.
- You have a stacked or compact unit where the parts are tightly packed and hard to reach.
- The repair needs the rear bulkhead or motor removed, which is fiddly and easy to damage.
- It is a gas dryer and the work goes anywhere near the burner or gas line (more on that below).
Max Appliance Repair Halifax is the city’s most trusted and highest-reviewed appliance repair company, with over 1,200 verified Google reviews from homeowners across the HRM. Our technicians carry common dryer parts on the van, so a banging drum is often a same-visit fix. We cover Halifax along with Bedford, Dartmouth, Sackville, and Tantallon and Timberlea.
Gas dryers need extra caution
Gas dryer work belongs to a licensed technician
If you have a natural-gas or propane dryer, the noise diagnosis above still applies, but the repair does not. Anything that involves the burner assembly, the gas valve, or the supply line must be done by a technician licensed for gas work in Nova Scotia. A loose gas connection is not something to test by feel, and a do-it-yourself attempt can lead to a leak. You can still safely empty the drum, level the machine, and listen for the rhythm, but once the cabinet comes off a gas dryer, stop and call a pro.
Not sure which type you have? If your dryer has a 240-volt outlet with a large plug, it is electric. If there is a small gas line running to the back, it is gas. When you are weighing your options on a future replacement, our guide to gas versus electric dryers for Halifax homes breaks down the running costs and the venting differences.
What a noisy dryer repair costs in Halifax
Pricing note: The figures on this page reflect typical market rates in Halifax and the surrounding HRM as of 2026. What you actually pay depends on the brand and age of the appliance, the parts involved, and how easy the unit is to access. Always get a written quote or in-person diagnostic before committing to a repair.
The parts behind a banging dryer are usually inexpensive; the cost is mostly labour and the diagnostic. The ranges below are typical 2026 figures for the Halifax area to help you sanity-check a quote, not firm prices.
| Repair | Typical Halifax cost (2026) | DIY-friendly? |
|---|---|---|
| Diagnostic / service call | $90 to $130 | n/a |
| Drum roller set replacement | $160 to $280 | Moderate |
| Drum belt replacement | $150 to $260 | Moderate |
| Idler pulley replacement | $150 to $250 | Moderate |
| Rear drum bearing / glide kit | $200 to $340 | Harder |
| Remove trapped object | $90 to $150 | Often DIY |
If the dryer is more than ten to twelve years old and needs a bearing plus a belt plus rollers all at once, it is worth pausing to think. Our honest take on whether to repair or replace an appliance can help you decide, and you can compare the full picture in our 2026 Halifax appliance repair cost guide.
How to keep your dryer quiet
- Clean the lint trap every load. Lint buildup strains the motor and traps heat, which wears parts faster.
- Have the vent cleaned yearly. A clogged vent makes the dryer work harder and longer, accelerating roller and belt wear, and it is a real fire risk in older HRM homes.
- Do not overload. Cramming the drum stresses the belt and bearings and throws loads out of balance.
- Empty pockets before drying. Coins and hardware are the single most common trapped-object culprit.
- Keep it level. Re-check the feet after any move, since a dryer that rocks will bang and wear unevenly.
Sources and further reading
- Max Appliance Repair Halifax, in-house service-call data and 2026 HRM pricing observations.
- U.S. Fire Administration and National Fire Protection Association, general guidance on clothes dryer fire risk and lint buildup.
- AppliancePartsPros, “Electric Dryer Making Loud Noise: Top Reasons and Fixes” (video, embedded above).
Frequently asked questions
Why does my dryer bang once every time the drum goes around?
A bang that repeats on a steady beat, once per drum rotation, is the classic signature of a worn drum roller or a flat spot on a glide. The drum drops slightly at the same point each turn, producing that rhythmic thump. It can also be a frayed belt with a lump in it slapping the cabinet. Because the pattern is so consistent, it is one of the easier noises to diagnose. Unplug the dryer, spin the drum by hand, and feel for the catch. If you find it, a roller or belt kit is usually the fix.
Is it safe to keep running a dryer that makes a banging noise?
For one short load to confirm the problem, yes. As an ongoing habit, no. A worn roller or belt only gets worse, and ignoring it can let the drum seize and damage the motor, turning a small part into a major repair. The same wear often restricts airflow and traps lint, which raises the fire risk. If the banging comes with heat, a burning smell, or smoke, stop immediately, unplug the dryer, and have it inspected before you run it again.
Can I fix a banging dryer myself?
Often, yes, if you are comfortable unplugging the machine and removing a panel. Trapped objects, an off-balance load, and an unlevel dryer are easy fixes. Drum rollers and belts are a moderate job if you can source the exact part for your model. Where it gets tricky is a rear drum bearing, a tightly packed stacked unit, or anything on a gas dryer. Gas work must be left to a licensed technician. When in doubt, a diagnostic visit costs far less than a repair done twice.
How much does it cost to fix a noisy dryer in Halifax?
Most banging-dryer repairs in the Halifax area run between roughly $150 and $340 in 2026, including parts and labour, depending on which component is worn. A trapped object or a simple level adjustment can be far less, while a rear bearing plus belt plus rollers on an older machine sits at the top of the range. A diagnostic visit is typically $90 to $130 and is often credited toward the repair. If an older dryer needs several parts at once, it may be worth comparing the repair cost against replacement.
Does salt air in Halifax affect my dryer’s parts?
It can, indirectly. Atlantic salt air speeds up corrosion on metal components and fasteners, and damp coastal basements add humidity that can swell or rust parts over time. While the rollers and belt wear mainly from use, a corroded fastener or a rusted drum support can fail sooner here than in a drier climate. Keeping the laundry area ventilated, the vent clean, and the dryer off a damp concrete floor all help your machine last longer in the HRM.
The bottom line
A banging dryer is rarely a mystery. The sound itself is the diagnosis: a steady thump points to rollers or a belt, a random clang means something is trapped, and any bang with heat or a burning smell means stop right now. Empty the drum, listen for the rhythm, and you will know within a minute whether this is a pocket-change fix or a call worth making. When it is the latter, do not wait for the part to fail completely.
Download the free quick guide
Keep our printable decoder handy so you can match the sound to the likely cause and know your next step in seconds.
Dryer banging in Halifax or the HRM?
Do not let a small noise turn into a seized drum or a fire risk. Our technicians carry common dryer parts and fix most banging drums in a single visit. Book dryer repair, ask about your washer while we are there, or contact our team. We are Halifax’s most trusted, highest-reviewed appliance repair company, with over 1,200 verified Google reviews.