Category Archives: Repair Guides

Step-by-step appliance repair and troubleshooting guides.

Washing Machine Not Spinning in Halifax? Causes, Fixes, and Costs

halifax washing machine not spinning

A washing machine that won’t spin leaves your clothes soaking wet and your laundry day completely derailed. In Halifax, where coastal humidity means damp clothes can sit for a while before they dry on their own, a non-spinning washer is more than a minor inconvenience. Before you call someone or start researching new machines, here’s what to check. For professional help, washing machine repair in Halifax is available same-day for most issues.

Unbalanced Load and Load Sensing

Modern washers have sensors that detect an unbalanced drum during the spin cycle and will slow down or stop spinning to prevent damage. If you notice your machine starts a spin, pauses, tries again a few times, then stops or displays an error code, an unbalanced load is the first thing to check.

Redistribute the load manually. Heavy items like jeans or towels tend to bunch on one side of the drum. Remove everything, redistribute evenly, and restart the spin cycle. This isn’t a component failure at all but it’s the cause of a surprising number of “washer won’t spin” calls.

HE front-load washers are particularly sensitive to this. They’re designed for smaller loads than older top-loaders, and overfilling them guarantees an out-of-balance spin failure. If your front-loader consistently struggles with spin cycles, you may simply be overloading it. The general rule for HE front-loaders is fill to about 80% capacity, which still looks quite full.

One note on Halifax laundry habits: many people in the city run large loads with heavy maritime gear, work uniforms, and thick winter clothes. These items are exactly what causes balance issues. Breaking one large load into two medium loads solves the spin problem without any repair needed.

Lid Switch (Top Loaders) and Door Latch (Front Loaders)

Top-loading washing machines won’t spin unless the lid switch signals that the lid is closed. When this switch fails, the machine typically fills and agitates normally but stops dead before the spin cycle begins. It’s a safety mechanism and one of the most common top-loader failures.

You can test the lid switch with a multimeter: it should show continuity when the lid is closed. Replacement switches typically run $15 to $30 and are accessible from inside the machine once the top panel is removed. On machines that are otherwise functioning normally, a lid switch is usually a same-morning DIY fix.

Front-loading machines use a door latch assembly instead. The latch must close and lock before the machine allows any water in or the drum to spin. If the latch is worn, the door doesn’t close solidly, or the latch switch has failed, the machine will either refuse to start or interrupt mid-cycle when it senses an unlocked door.

Front-loader door latches are more complex than lid switches, involving both the mechanical latch and an electronic lock solenoid. Parts run $30 to $60 and the replacement is moderately complex, requiring removal of the door boot seal on most models to access the latch from inside. If the door itself isn’t closing flush, the hinge may also need adjustment.

Drain Pump Failure

Most washing machines require a complete drain before they’ll enter the high-speed spin cycle. If the drain pump is failing or blocked, the machine can’t drain water out, and the spin cycle won’t run because the machine detects water still in the drum.

Symptoms: the washer stops mid-cycle with water in the drum, often displaying a drain error code. Some machines will attempt to drain for a set time, give up, and lock. Others will just pause indefinitely with the drum full of water.

The drain pump can fail mechanically (impeller is broken or seized) or it can be blocked by a foreign object. Halifax front-load users should know that most machines have a small filter at the bottom front of the machine, accessible through a small panel. This filter catches coins, hair ties, and small items before they reach the pump. If yours has never been cleaned, start there before assuming the pump is bad.

An impeller that’s seized from debris usually makes a loud humming noise when the machine tries to drain. A completely failed pump motor makes no sound at all. Replacement pumps run $40 to $80 for most brands. Labour to swap one is typically 30 to 45 minutes.

Motor Coupling and Drive Belt

On top-loading machines, particularly older Whirlpool and Maytag designs, a plastic motor coupling connects the motor to the transmission. This coupling is designed to break before the motor or transmission takes damage from a seized pump or overloaded drum. When it breaks, the motor runs and makes noise, but the drum doesn’t move.

Motor coupling failures are more common on older machines and machines that are habitually overloaded. The coupling itself costs $10 to $20. Replacement requires tipping the machine and removing the pump and motor, which is straightforward but physical work. On a machine that’s otherwise in good condition, a coupling replacement is one of the most cost-effective repairs you can make.

Front-loading machines and some newer top-loaders use a direct-drive motor and don’t have a coupling or belt. However, many machines from Samsung, LG, and some GE models use a belt between the motor and drum. A snapped belt produces a similar symptom: motor hums or runs, drum doesn’t move. Belts are inexpensive ($10 to $30) but getting to them requires significant disassembly on front-loaders.

Control Board and Motor Control Issues

When the machine fills normally and appears to reach the spin portion of the cycle but then does nothing, with no noise and no movement, the motor control board or main control board may have failed. These boards control when and how fast the motor runs, including the spin speed.

Control board failures are rarely the first thing to check. They’re expensive to replace and easy to misdiagnose. Before assuming the board is bad, confirm that the motor itself is functional (it typically makes some noise even when a board issue is preventing proper operation), that wiring connections are secure, and that no error codes point to a specific component.

Motor control boards are brand and model specific. Replacement costs vary widely, from $80 for a common Samsung motor board to $250 or more for some Miele or Bosch units. A technician with diagnostic experience can usually isolate a board failure in under 30 minutes using a voltage test at the board output terminals.

Front Loader Drum Bearing Wear

This is the most expensive washing machine repair short of replacing the machine. The drum bearing supports the weight of the drum and allows it to spin smoothly. When it wears out, the drum wobbles, metal-on-metal contact develops, and the spin cycle becomes loud enough to rattle the walls.

Halifax front-load owners in older homes with vibration-prone laundry closets may notice this problem earlier than average, because the constant vibration of an improperly mounted machine accelerates bearing wear. A machine that shakes violently during spin cycles is both annoying and a bearing-killer.

By the time a bearing has failed, the noise is unmistakable: a loud grinding or roaring during spin that gets worse at high speeds. The repair itself involves replacing the bearing and shaft seal inside the drum assembly, which requires nearly complete disassembly. Labour time runs 2 to 3 hours on most front-loaders.

On machines under 6 years old in otherwise good condition, bearing repair makes sense. On a 10-year-old machine that’s already seen other repairs, the cost of a bearing job often approaches the value of a similar used appliance.

FAQ: Washing Machine Not Spinning in Halifax

Why does my washer fill and wash but stop before spinning?

This is almost always a lid switch failure (top loaders), a door latch issue (front loaders), or a drain problem that prevents the machine from emptying before the spin cycle. Check the lid or door closure first. If that’s fine, check whether there’s still water in the drum before it refuses to spin.

My washing machine is making a loud grinding noise during spin. What is it?

Loud grinding or roaring during spin on a front-loader is almost always a drum bearing. On a top-loader, it could be a worn clutch or worn drum bearings. Both are serious mechanical failures that won’t resolve on their own and will get worse until something breaks completely. Get it diagnosed soon.

How much does washing machine repair cost in Halifax?

Lid switch and door latch replacements run $80 to $160 installed. Drain pump replacement is $120 to $200. Motor coupling is $80 to $140. Drum bearing replacement is $250 to $450 depending on the brand and labour time required. Diagnostic call-outs in Halifax are typically $80 to $100, credited toward the repair.

Can I manually spin clothes in a washer that won’t spin?

There’s no safe manual spin option. What you can do is remove very wet clothes and wring them by hand, then run them through the spin cycle of a working machine if you have access to one, or take them to a laundromat for a spin cycle only. It’s not a solution but it handles the immediate problem while you arrange a repair.

Is a 9-year-old washer worth repairing if the motor coupling fails?

Yes. A motor coupling on a 9-year-old machine is a $80 to $140 repair on an appliance that likely has years of life left if otherwise maintained. The coupling is a wear part, not a sign the machine is failing. Contrast this with a drum bearing job on the same machine, where the math is closer and worth discussing with a technician before committing.

Need Washing Machine Repair in Halifax?

Max Appliance Repair covers Halifax, Dartmouth, Bedford, Timberlea, and across HRM. Same-day appliance repair is available most days. Whether your front-loader is stuck mid-cycle or your top-loader never makes it to spin, a diagnostic visit is the fastest way to get back to a working laundry routine. Book online or call today.

What’s That Smell? Why Your Washing Machine Stinks and How to Fix It

Illustrated washing machine with odor symbols

You pull your clothes out of the washer expecting that fresh-laundry smell — and instead get hit with something musty, sour, or downright foul. If your washing machine smells bad, you are not alone. It is one of the most common complaints we hear from Halifax homeowners, and it almost always has the same small set of causes. The good news: it rarely means anything is mechanically broken.

Why Does My Washing Machine Smell?

The short answer: mould, mildew, and bacteria. Your washer is a warm, damp, enclosed space — the perfect breeding ground. Here is what creates the conditions:

1. The Door Gets Closed Between Loads

Did you know? Front-load washers are significantly more prone to mould odour than top-loaders because the door gasket creates a deep rubber pocket where water pools and sits after every cycle. Samsung, LG, and Whirlpool front-loaders are the most common washers we see with odour complaints in Halifax. The fix is the same for all of them: leave the door ajar after every wash.

This is the single biggest cause. When you close the door after a wash cycle, moisture gets trapped inside the drum and rubber gasket. Within hours, mould begins to grow. Front-load washers are especially prone because the door seal creates a pocket where water sits.

2. Too Much Detergent

Using more soap does not make clothes cleaner — it creates excess residue that coats the inside of the drum, door seal, and drain system. This soapy film becomes a food source for mould and bacteria. If you are using a front-loader or HE (high-efficiency) machine, you need HE detergent and less of it than you think. Most people use 2 to 3 times the required amount.

3. Only Cold Washes

Cold and warm cycles are great for saving energy and protecting fabrics. But if you never run a hot cycle, bacteria and soap scum build up over time without anything to kill them off. Running one hot cycle per week — even an empty drum clean — makes a significant difference.

4. Standing Water in the Drain System

A partially clogged drain pump or kinked drain hose can leave small amounts of water sitting in the system between cycles. This stagnant water turns foul quickly and the smell gets carried into the drum on the next wash.

How to Get Rid of the Smell

Step 1: Run a Cleaning Cycle

Most modern washers have a dedicated Clean or Tub Clean cycle. Run it with one of these:

  • Option A: 1 cup of white vinegar in the drum plus half a cup of baking soda in the detergent dispenser
  • Option B: A commercial washing machine cleaner tablet (Affresh, Tide Washing Machine Cleaner)

Use the hottest, longest cycle available with no clothes in the machine.

Step 2: Clean the Door Seal (Front-Loaders)

Pro tip: Peel back the rubber gasket around the door and you will likely find a ring of black mould, hair, and grime hiding in the folds. Clean it with equal parts white vinegar and water, or a diluted bleach solution (1 part bleach to 10 parts water). Use an old toothbrush to get into the deep folds, then wipe completely dry. This is the most effective single step for front-loader odour.

Step 3: Clean the Detergent Dispenser

Pull out the detergent drawer — most slide out completely — and soak it in hot soapy water. Scrub off any residue or mould. Also clean inside the housing where the drawer sits; this area accumulates buildup that is easy to miss and is a common odour source.

Step 4: Clean the Drain Filter

Front-load washers have a small drain filter usually behind a panel at the bottom front. Place a towel underneath (water will come out), unscrew the filter, and clean out any debris — coins, hair ties, and lint are common finds. This spot also accumulates odour-causing buildup that a drum cleaning cycle cannot reach.

How to Prevent the Smell from Coming Back

  1. Leave the door open after every wash — even just slightly ajar; this is the single most effective prevention step
  2. Wipe the door seal dry after each use — takes 10 seconds and prevents mould growth in the gasket folds
  3. Use the right amount of HE detergent — follow the measuring lines on the cap; more is not better
  4. Run a hot cleaning cycle monthly — with vinegar, baking soda, or a commercial cleaner
  5. Do not leave wet clothes sitting — transfer to the dryer promptly after the cycle ends
  6. Clean the drain filter quarterly — takes 5 minutes and prevents both odour and drainage problems

When the Smell Means Something Is Actually Wrong

In rare cases, a persistent smell that will not go away with cleaning indicates a real mechanical problem:

  • Rotten egg smell: Could indicate a drain issue or sewer gas backup through an improperly installed drain hose (missing high loop or air gap)
  • Burning smell: Motor issue, worn belt, or electrical fault — stop using the washer and call for washer repair immediately
  • Smell returns within days of deep cleaning: Mould may have penetrated the outer tub, drain hose, or areas you cannot reach without disassembly

If you have tried all the cleaning steps above and the smell persists, it is time for a professional inspection. Sometimes the outer drum or drain system needs to be disassembled and cleaned or replaced — not a DIY job.

Washer Smelling Bad Even After Cleaning?

We diagnose and fix persistent washer odour issues for all brands. Same-day service across HRM.

Book a Technician

or call (902) 904-5559

Frequently Asked Questions

Why does my front-load washer smell even after cleaning?

If the smell returns quickly after a cleaning cycle, the mould has likely penetrated beyond what a drum clean can reach — specifically the outer tub behind the drum, the drain hose, or deep inside the door gasket folds. The first step is to manually clean the door gasket with a toothbrush and bleach solution and the drain filter at the bottom front. If that does not resolve it, the outer tub and drain components may need to be disassembled and cleaned or replaced by a technician.

Can too much detergent cause a washing machine to smell?

Yes — this is one of the most common causes. Excess detergent that does not fully rinse out coats the drum, door seal, and drain system with a soapy film. This residue becomes a food source for bacteria and mould. HE front-loaders need HE detergent used in much smaller quantities than people typically use. If you have been overdosing detergent, run 3 to 4 empty hot cycles to flush the residue, then use the correct amount going forward.

How do I clean the filter on my front-load washing machine?

The drain filter on most front-load washers is behind a small access panel at the bottom front of the machine. Place a shallow dish or towels on the floor underneath. Slowly unscrew the filter cap — water will drain out. Pull out the filter and rinse it under running water, using a brush to remove lint, debris, coins, and hair. Reinsert and tighten the cap firmly. This should be done every 2 to 3 months, or whenever you notice slower draining or odour.

Is washing machine smell harmful?

The musty or sour smell from a washing machine is caused by mould and bacteria, which can transfer to your clothes. For most people this is an inconvenience rather than a serious health risk. However, people with mould sensitivities, allergies, or respiratory conditions may react to clothing washed in a contaminated machine. A persistent burning smell is more serious — that indicates an electrical or mechanical fault and the machine should not be used until inspected.

How often should I run a cleaning cycle on my washing machine?

Once a month is the standard recommendation for most households. If you do laundry daily, live in a humid climate (Halifax qualifies), or have had odour problems before, every 2 to 3 weeks is better. Use a dedicated washing machine cleaner tablet or a cup of white vinegar plus half a cup of baking soda on the hottest cycle available with no clothes in the drum.

Related Posts

Dishwasher Not Draining? 7 Causes and Fixes

Step-by-step troubleshooting for all brands

Appliance Repair Cost Guide — Halifax 2025

What to expect to pay for washer and dryer repairs

Oven Not Heating in Halifax? How to Diagnose and Fix It

halifax oven not heating

When your oven stops heating, dinner plans fall apart quickly. The good news is that most oven heating failures come down to a handful of components that are diagnosable and repairable without replacing the whole appliance. If you’re in Halifax and dealing with this problem, oven repair in Halifax is available same-day in most cases. But first, here’s what’s likely wrong and what it takes to fix it.

Bake Element Failure (Electric Ovens)

The bake element is the most common failure point in electric ovens. It’s the coiled heating element at the bottom of the oven cavity. When it fails, bake mode stops working entirely while the oven may still appear functional in other ways, the clock works, the broiler might still function, but the oven simply never reaches temperature.

Visual inspection often tells you immediately. Look for obvious breaks, cracks, or burnt spots on the element. A healthy element should be smooth and uninterrupted. Sometimes a failing element will blister or develop a visible hotspot before it breaks. If it’s visually intact but still not heating, test it with a multimeter, a working element shows continuity.

Bake elements are among the most affordable appliance parts, typically $20 to $60 depending on the brand and model. They slide out and connect with two terminals in most standard ovens, making replacement a manageable task for someone who’s comfortable with basic appliance repair. The oven must be unplugged and cooled before you start.

Note that on convection ovens, there’s often a separate convection element at the back of the cavity in addition to the bake element at the bottom. If convection heat works but bake doesn’t, the bottom bake element is the problem. If neither works, the issue is further upstream in the control circuit.

Broil Element and Dual-Element Ovens

The broil element sits at the top of the oven cavity. On many modern ranges, it handles both the broil function and contributes to preheat on certain models. If your oven heats partially, takes forever to reach temperature, or only the top of food gets cooked, the broil element may have failed.

Some oven models use a hidden bake element under the oven floor with the visible broil element doing the heavy lifting during preheat. If yours is this type and the broil element fails, preheat will either stop working or take dramatically longer than normal.

Broil element failures are less common than bake element failures because broil mode sees less continuous use in most households. When they do fail, the pattern is usually a visible break in the element coil or a circuit test showing no continuity.

Replacement is similar to the bake element: unplug, let cool, remove the old element (usually 2 screws and 2 wire terminals), install the new one. Parts run $25 to $70 for most common brands including Frigidaire, GE, and Samsung, which are the most common in Halifax homes.

Gas Oven Igniter Problems

Gas oven igniters are the most common failure point in gas ovens. The igniter serves a dual purpose: it glows to ignite the gas, and it draws enough current to open the gas valve. As igniters age, they weaken and no longer draw sufficient current to open the valve reliably, even if they still glow.

This creates a confusing symptom: you can see the igniter glowing orange, but the burner never lights. The igniter appears to be working but the gas valve stays closed. The igniter has weakened below the threshold needed to open the valve, even though it still glows enough to be visible.

Testing requires an ammeter, not just a multimeter. A working gas oven igniter should draw 3.2 to 3.6 amps. Anything below 3.2 amps means the igniter is too weak to reliably open the valve even if it still glows. Some techs use visual timing as a rough guide: if the igniter takes more than 90 seconds to light the burner, it’s on its way out.

Igniter replacement is one of the more common gas appliance repairs. Parts run $30 to $60 for most models. The job requires shutting off the gas, removing the oven bottom panel, and accessing the burner assembly. While not high-risk compared to gas line work, having a technician handle it is advisable if you’re not confident working near gas components.

Temperature Sensor and Thermostat

The temperature sensor is a probe that extends into the oven cavity and reports the internal temperature to the control board. If it fails, the oven either won’t heat at all (board sees an out-of-range reading and shuts down heating), heats inconsistently, or displays an error code.

Common symptoms of a failing sensor: oven runs too hot or not hot enough even when set correctly, food comes out burnt on the outside and raw in the middle, or the oven displays an F-series error code (F2, F3, F5 depending on brand). These error codes often point directly to the temperature sensor.

Sensors test with a multimeter as well. Most oven temperature sensors should read approximately 1,000 to 1,100 ohms at room temperature. Significantly outside that range means the sensor is faulty. Replacement sensors run $15 to $40 and are typically mounted with one or two screws inside the oven cavity.

Older ranges with mechanical thermostats rather than electronic sensors are a different situation. The thermostat is a capillary tube and bulb system that regulates temperature mechanically. These rarely fail completely but can drift over time, causing the oven to run significantly hotter or cooler than indicated. Calibration is sometimes possible through the control panel; full replacement is the other option.

Control Board and Electronic Ignition

The control board is the least likely cause of an oven not heating, but it does happen. When the board fails, it may not send the heating signal at all, making it seem like the element or igniter is the problem when the real issue is upstream.

Before assuming the board is bad, rule out everything else. Control boards are expensive, $100 to $300 depending on the oven brand, and misdiagnosis is costly. A tech with the right diagnostic tools can confirm a board failure with certainty rather than guessing.

On gas ranges with electronic ignition (the type that clicks when you turn a burner on), control board failures can also affect the oven ignition circuit while leaving the surface burners working normally. If your surface burners click and light fine but the oven does nothing, and you’ve ruled out the igniter and sensor, the board is worth investigating.

What Halifax Homes Should Know

Halifax homes have a mix of gas and electric cooking setups. Older homes in the South End, North End, and Dartmouth often have gas ranges. Newer condos and apartments, especially in the downtown core and Bedford, typically have electric. Knowing which type you have matters because the diagnostic path is completely different.

Atlantic humidity and salt air don’t directly affect oven internals the way they affect exterior appliances, but they do contribute to connector corrosion on older ranges. If your oven started having intermittent heating issues that come and go rather than a complete failure, corroded wire terminals at the element or sensor connections are worth checking.

HRM’s electrical grid is stable but the area does see occasional power surges during severe weather. Control board failures sometimes follow a major storm event. If your oven stopped working after a notable weather event, mention that to your technician, it helps focus the diagnosis.

FAQ: Oven Not Heating in Halifax

My oven turns on but won’t heat up. What should I check first?

For electric ovens, look at the bake element at the bottom of the oven cavity. Check for visible breaks or burnt spots. For gas ovens, watch whether the igniter glows when you set the oven to bake. If it glows but the burner doesn’t light within 90 seconds, the igniter is likely too weak. Either way, ruling out the simplest component first saves time and money.

My oven preheats but takes forever and doesn’t reach temperature. Why?

Slow preheating with a failure to reach the set temperature usually points to a partially failed element, a weak gas igniter cycling on and off, or a faulty temperature sensor giving inaccurate readings to the control board. All three are diagnosable with a multimeter and the right tests.

How much does oven repair cost in Halifax?

A bake element replacement typically runs $100 to $180 including parts and labour. Gas igniter swaps are similar, $120 to $200 installed. Temperature sensor replacement is usually $80 to $140. Control board replacement is $200 to $400 depending on the brand. Diagnostic call-outs in Halifax are typically $80 to $100, credited toward the repair if you proceed.

Should I repair or replace a 12-year-old oven that stopped heating?

If the repair is a bake element or igniter, even on a 12-year-old range, the cost is usually low enough that repair makes sense. If the control board has failed on a 12-year-old range that’s also showing other wear, replacement becomes more attractive. The break-even point is generally when repair costs exceed 50% of a comparable replacement appliance.

Is it safe to use a gas oven if the igniter is weak?

A weak igniter that can’t reliably open the gas valve may cause the oven to attempt to ignite, fail, then try again with unburned gas in the cavity. This is a safety concern. If your gas oven’s igniter is slow or unreliable, don’t use the oven until it’s repaired. Gas accumulation in an enclosed oven cavity before ignition is genuinely dangerous.

Book Oven Repair in Halifax Today

Max Appliance Repair serves Halifax, Dartmouth, Bedford, Sackville, and the broader HRM area. Same-day service is available for oven repairs in most parts of the city. Whether it’s a failed bake element, a gas igniter that’s not lighting, or an error code you can’t clear, a diagnosis is the fastest way to get your oven working again. Call or book online now.

Why Is My Dishwasher Not Draining? 7 Causes and How to Fix Them

Illustrated dishwasher with water pooling and wrench tool icon

You open your dishwasher expecting clean dishes and instead find a pool of murky water sitting at the bottom. It is one of the most common appliance complaints we hear from Halifax homeowners — and fortunately, it is often fixable without a service call. Here are the 7 most common reasons your dishwasher is not draining, starting with the ones you can check yourself.

1. The Drain Filter Is Clogged

This is the number one cause of dishwasher drainage problems — and it is the easiest to fix. Every dishwasher has a filter at the bottom of the tub designed to catch food particles before they reach the drain pump. Over time, grease, food debris, and even small pieces of broken glass can clog it completely.

Pro tip: Clean your dishwasher filter at least once a month. If you run your dishwasher daily, every two weeks is even better. This single habit prevents the majority of drainage issues — no service call needed.

To clean it: remove the bottom dish rack, locate the cylindrical filter at the bottom centre of the tub, twist counterclockwise and pull it out, rinse under hot running water and scrub with a soft brush, then reinstall and run a short cycle to test.

2. The Garbage Disposal Connection Is Blocked

If your dishwasher drains through your kitchen garbage disposal (most do), a clogged disposal can prevent drainage entirely. This is especially common if the disposal has not been run recently, or if a new disposal was installed without removing the drain knockout plug.

Run the garbage disposal with water flowing for 15 to 20 seconds to clear any blockage. If you recently had a new disposal installed, check that the knockout plug on the dishwasher inlet was removed — this is a surprisingly common installation mistake.

3. The Drain Hose Is Kinked or Clogged

The drain hose connects your dishwasher to the drain under the sink. It can become kinked if the dishwasher was recently moved or pushed back into place, or clogged with accumulated grease and debris. Pull the dishwasher forward slightly and inspect the hose for kinks. If you suspect an internal clog, disconnect the hose (place a towel underneath to catch water) and flush it with hot water. If water does not flow freely through, the hose needs cleaning or replacement.

4. The Drain Pump Is Failing

Did you know? The drain pump on most dishwashers is not a wear item you would replace regularly — they typically last the life of the appliance. When they do fail, it is usually due to a foreign object (glass shard, piece of bone) getting past the filter and jamming the impeller. If you hear grinding or buzzing during the drain cycle, this is the likely cause.

The drain pump is the motor that actively pushes water out of the dishwasher. When it fails, water has nowhere to go and sits in the bottom of the tub. You might hear a humming sound (pump trying but failing) or complete silence during the drain phase. Drain pump replacement requires disassembly and is best handled by a technician.

5. The Air Gap or High Loop Is Missing

Dishwashers need either an air gap (a small device mounted on the countertop or sink) or a high loop (the drain hose looped up near the top of the cabinet) to prevent dirty sink water from flowing back into the dishwasher. Without one, water can siphon back and cause standing water that looks like a drainage failure. This anti-siphon measure is required by most building codes in Nova Scotia. If your dishwasher was recently installed or the plumbing was modified, check that it is in place.

6. The Check Valve Is Stuck

The check valve (or flapper valve) is a one-way valve that prevents drained water from flowing back into the dishwasher. If it is stuck closed, water cannot drain out. If it is stuck open, water flows back in after draining, leaving a small amount of standing water at the end of the cycle. This part is usually located near the drain pump and requires partial disassembly to inspect. It is inexpensive but requires correct diagnosis.

7. A Control Board Issue Is Preventing the Drain Cycle

Modern dishwashers use electronic control boards to manage every phase of the wash cycle, including draining. If the board has a fault, it may skip the drain cycle entirely even though washing and rinsing work fine. Clues: the dishwasher completes the wash cycle but never initiates draining, error codes appear on the display, or the drain works when manually activated but not during normal cycles. Control board diagnosis requires testing with a multimeter and should be done by a qualified technician.

Error Codes by Brand

Brand Error Code Meaning
Bosch E24 Drain fault — usually kinked hose or pump blockage
Samsung 5C / SC Drain failure — often food debris in the pump
LG OE Drain timeout — check filter and pump
Whirlpool / Maytag F9 E1 Long drain — pump or hose issue
Miele F11 Drain error — fine filter or drain pump

How to Prevent Dishwasher Drainage Problems

  1. Scrape plates before loading — you do not need to pre-rinse, but large food scraps should go in the garbage
  2. Clean the filter monthly — this single habit prevents the majority of drain issues
  3. Run hot water at the sink before starting the dishwasher — this dissolves grease from the start of the cycle
  4. Run a cleaning cycle monthly — use a dishwasher cleaner or a cup of white vinegar on the top rack during an empty hot cycle
  5. Check the drain hose annually — look for kinks, cracks, or buildup where it connects under the sink

Dishwasher Still Not Draining? We Can Help Today.

Same-day service across Halifax, Dartmouth, Bedford, and HRM. 3-Month Parts and Labour Warranty.

Book a Technician

or call (902) 904-5559

Frequently Asked Questions

Why is my dishwasher not draining but no error code is showing?

The most common causes that do not trigger an error code are a clogged drain filter, a kinked drain hose, or a garbage disposal blockage. These mechanical obstructions stop water from moving but do not always register as a fault on the control board. Start by removing and cleaning the filter at the bottom of the tub, then run the garbage disposal for 20 seconds, then check the drain hose under the sink for kinks. In most cases, one of these three steps will resolve the problem.

Can I run my dishwasher if it has standing water at the bottom?

It is not recommended. Running a dishwasher with standing water means the next cycle will mix with old dirty water, leaving dishes unclean and potentially spreading bacteria. It also puts strain on the drain pump, which is trying to push water through a blockage. Clean the filter first — if that does not resolve it, have a technician look at it before running more cycles.

How much does dishwasher drain repair cost in Halifax?

Simple repairs like a clogged filter, hose kink, or check valve replacement typically cost $80 to $150 including the service call. A drain pump replacement runs $150 to $280 parts and labour. A control board is more — $200 to $400 depending on the brand. At Max Appliance Repair we give you a firm quote before any work begins. Call (902) 904-5559 to book a diagnostic visit.

Is it worth repairing a dishwasher that is not draining, or should I replace it?

For most dishwashers under 10 years old, repair is the better financial choice. A drain pump or control board repair at $150 to $350 is far less than a new mid-range dishwasher at $700 to $1,200 installed. On a dishwasher over 12 years old with a major repair needed, replacement starts to make sense. Our technicians will give you an honest recommendation based on the repair cost and the age of your appliance.

What is the Bosch E24 error and how do I fix it?

The Bosch E24 error means the dishwasher has failed to drain within the expected time. Start by cleaning the fine mesh filter at the bottom of the tub — Bosch dishwashers have a two-part filter system that requires monthly cleaning. Then check the drain hose behind the dishwasher for kinks. If neither resolves it, the drain pump or check valve likely needs replacement. Bosch drain pump repairs are one of our most common dishwasher service calls in Halifax.

Related Posts

Samsung Fridge Not Cooling? Here Is What to Check

Troubleshooting guide covering demo mode, coils, and error codes

Appliance Repair Cost Guide — Halifax 2025

What to expect to pay for common repairs in Nova Scotia

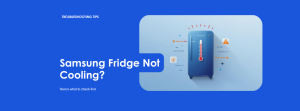
Samsung Fridge Not Cooling? Here’s What to Check Before Calling a Tech

Illustrated Samsung refrigerator with warm temperature warning and troubleshooting checklist

You open the fridge and your milk is warm. Your leftovers have gone off. Your Samsung refrigerator is running — you can hear it — but it is clearly not cooling. This is one of the most common refrigerator complaints we get in Halifax, and the good news is that several causes are fixable without a service call. This guide walks through each one in order, from the easiest checks to the ones that require a technician.

1. Check the Door Seals First

A damaged or loose door gasket is responsible for a surprising number of “fridge not cooling” calls. If cold air is leaking out constantly, the compressor can never keep up. Run your hand around the door edge while the fridge is closed — you should feel no air escaping. The dollar bill test is even easier: close the door on a bill and try to pull it out. If it slides out with no resistance, the seal is weak.

Samsung gaskets can warp after several years, especially on lower freezer drawers. Replacement gaskets for most Samsung models are available and cost $30 to $70. Cleaning the existing gasket with warm soapy water sometimes restores a temporary seal if the rubber has just stiffened from grime.

2. Is It Stuck in Demo Mode?

This catches people off guard. Samsung refrigerators have a showroom demo mode (sometimes called “OF OF” or “O FF” on the display) that disables cooling while keeping the lights and display active. Retailers use it on the floor. If your unit was recently installed or had a power interruption, it may have reverted to demo mode.

Did you know? On most Samsung French door and side-by-side models, you can exit demo mode by pressing and holding the Energy Saver and Power Freeze buttons simultaneously for 3 seconds. The display will change and cooling will resume within 20 to 30 minutes.

If the display shows “OF OF”, “O FF”, or “DEMO” — or if the interior light works but nothing is cold after several hours — check your model’s manual for the exact button combination. Samsung’s support site lists the specific sequence for each series.

3. Blocked Air Vents

Cold air circulates from the freezer section through vents into the fresh food compartment. If those vents are blocked by a container pushed too far back, or by frost buildup, airflow stops and the fridge section warms up even though the freezer stays cold.

Pull everything away from the back wall of both compartments. Look for a plastic panel at the rear of the freezer — that is the evaporator cover, and there should be visible vents. If you see heavy frost coating the back wall or the fan area, you likely have an ice buildup problem (covered in section 7).

4. Dirty Condenser Coils

Pro tip: Samsung refrigerators with bottom-mount freezers have condenser coils at the bottom rear, accessible by removing the back panel or the kick plate at the front bottom. Use a coil brush and vacuum. Doing this once a year can meaningfully improve cooling efficiency and extend compressor life.

Condenser coils release heat from the refrigerant. When they are coated in dust and pet hair, they cannot release heat efficiently, so the refrigerant arrives at the evaporator still warm. The result: the fridge runs constantly but never reaches target temperature.

This is especially relevant in Halifax homes with pets or dusty basements. Coils on Samsung models are typically at the back bottom or in a rear compartment. Unplug the fridge, vacuum the coils with a brush attachment, and plug it back in. Many people report a noticeable improvement within a few hours.

5. Temperature Settings

This sounds obvious, but settings do get accidentally changed — especially on Samsung models with touch displays that can register a brush from a cloth or a child’s hand. Samsung recommends 37°F (3°C) for the fresh food compartment and 0°F (-18°C) for the freezer.

If your settings look correct but the actual temperature is warmer (you can check with a fridge thermometer), the problem is mechanical rather than a setting issue. Move on to sections 6 and 7.

6. Compressor and Evaporator Fan

The evaporator fan circulates cold air from the freezer coils throughout the fridge. If it fails, the freezer may stay cold but the fridge section will warm up. Open the freezer and listen — you should hear a fan running. If the compressor is running (humming sound from the back or bottom) but no fan noise is coming from inside the freezer, the evaporator fan motor has likely failed.

The condenser fan (near the compressor at the back or bottom) pulls air across the coils and over the compressor. A failed condenser fan causes the compressor to overheat and shut down on thermal protection. You will hear the fridge go completely silent for long periods.

Both fan motors are parts a technician can replace in a single visit. They are not typically DIY repairs because they require pulling the appliance out, removing panels, and safely discharging residual capacitor energy.

7. Ice Buildup on the Evaporator

Did you know? Samsung introduced a class action settlement in several markets over defrost system failures in French door models. If your Samsung fridge has persistent ice buildup on the evaporator and was purchased between 2014 and 2018, it may be covered under an extended warranty or settlement program. Check Samsung’s official support site for your model number.

Samsung French door refrigerators have had a well-documented issue with ice building up behind the rear panel of the freezer, blocking airflow. The defrost heater or defrost thermostat fails, so the automatic defrost cycle never runs, and frost accumulates over days until airflow is completely blocked.

Signs: freezer appears fine but fresh food section is warm, you hear the fan but airflow from the vents is weak, or you can see frost coating the back panel of the freezer. A temporary DIY fix is to manually defrost by unplugging the fridge for 24 to 48 hours with the doors open and towels on the floor. This will restore cooling — but it will return within weeks if the defrost system is not repaired.

8. Samsung Error Codes Related to Cooling

Samsung refrigerators display error codes when sensors detect a fault. Here are the most common codes related to not cooling:

Code Meaning Likely Fix
5E / SE Freezer defrost sensor fault Replace defrost sensor — technician required
22E Freezer fan motor fault Replace evaporator fan motor
41C Ice maker communication error Reset or replace ice maker assembly
83E Voltage error (power supply) Check outlet and breaker — may need control board
88 88 Communication error / power interruption Unplug for 60 seconds, plug back in to reset

To enter diagnostic mode on most Samsung models, press and hold Freezer and Fridge simultaneously for 8 seconds. The display will cycle through sensor readings. If you see a code not listed above, Samsung’s support site has a full code reference by model number.

9. When to Call a Technician

Call a technician when:

  • You have cleared ice buildup manually but it returns within 2 to 3 weeks (defrost system needs repair)
  • The compressor is not running at all (completely silent at the back)
  • An error code related to a sensor or fan motor is displayed
  • The fridge runs continuously but never reaches temperature after you have cleaned the coils and confirmed proper settings
  • You notice the compressor is extremely hot to the touch

Most Samsung fridge repairs in Halifax run $150 to $350 depending on the part. A compressor replacement is more — $400 to $700 — and at that price point it is worth comparing against a new unit. A technician can give you an honest assessment of whether repair makes financial sense for your model and age.

Samsung Fridge Not Cooling? We Service All of Halifax.

Same-day and next-day appointments available. Fully licensed technicians.

Book a Technician

or call (902) 904-5559

Frequently Asked Questions

Why is my Samsung fridge not cooling but the freezer is fine?

This is the classic sign of a blocked evaporator or a failed evaporator fan. Cold air is generated in the freezer section and circulated into the fridge compartment by a fan. If frost has built up behind the freezer’s rear panel, it blocks airflow. The freezer stays cold because it is right next to the evaporator coils, but the fridge section gets no cold air. A manual defrost (unplugging for 24 hours) will confirm this — if cooling returns afterward, the defrost heater or thermostat needs replacement.

How do I reset my Samsung refrigerator?

Unplug the refrigerator from the wall outlet and wait 60 seconds. Plug it back in. This clears most minor communication errors and resets the control board. If the display showed “88 88” or similar power-related codes, a reset often resolves it. For a full factory reset of settings, hold the Energy Saver and Freezer buttons for 8 to 10 seconds until you hear a chime — this resets temperature settings to default without clearing stored error history.

How much does it cost to repair a Samsung fridge in Halifax?

Most Samsung refrigerator repairs in Halifax cost between $150 and $350 including parts and labour. Common repairs like a defrost heater, door gasket, or fan motor replacement tend to fall at the lower end. A control board or sealed system repair (compressor, refrigerant) costs more — typically $350 to $700. At Max Appliance Repair we provide a diagnostic estimate before any work begins so there are no surprises.

Is it worth repairing a Samsung refrigerator that is more than 8 years old?

It depends on the repair cost relative to replacement. A general rule: if the repair is less than 50% of the cost of a comparable new unit, repair makes sense. Samsung fridges typically last 12 to 15 years with proper maintenance. Common issues like a defrost sensor or fan motor at year 8 or 9 are absolutely worth fixing. A failed compressor on a 12-year-old unit is a harder call — our technicians will give you an honest assessment rather than pushing an unnecessary repair.

Can Samsung fridge repairs be done same day in Halifax?

Yes — Max Appliance Repair offers same-day and next-day service throughout Halifax. We carry common Samsung fridge parts on the truck including defrost heaters, fan motors, door gaskets, and thermostats. If the part needs to be ordered, we can usually complete the repair within 1 to 3 business days. Call (902) 904-5559 or use the contact form below to book.

Related Posts

Appliance Repair Cost Guide — Halifax 2025

What to expect to pay for common repairs in Nova Scotia

Dishwasher Not Draining? Here Is Why

Step-by-step troubleshooting for most brands