Tag Archives: Halifax appliance repair

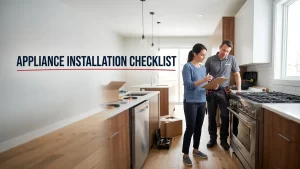
Appliance Installation Checklist: What Halifax Homeowners Often Forget

Appliance installation checklist, a new stainless range and dishwasher being installed in a Halifax kitchen

A good appliance installation checklist is not really about the appliance. It is about everything around it: the outlet, the water shutoff, the vent, the floor, and the doorway you have to get the thing through. The machine itself almost always works on day one. The problems show up weeks later, when a dishwasher floods because nobody checked the drain hose loop, or a new fridge runs warm because it was jammed against a wall with no airflow. Those are the details Halifax homeowners forget, and they are the ones that lead to an early repair call.

After installing and servicing thousands of appliances across the HRM, we have a short mental list we run through every single time. This guide turns that list into something you can use, whether you are doing the install yourself or just making sure the delivery crew did it right before they drive away.

Before you buy: measure twice

The most expensive installation mistake happens before the appliance even arrives: it does not fit. Measure the opening height, width, and depth, then measure again, and do not forget the path to get there. A counter-depth fridge that fits the alcove perfectly is useless if it will not turn the corner at the top of a narrow Halifax staircase.

  1. The opening. Height, width, and depth, including any trim, baseboard, or backsplash that eats into the space.
  2. The doorways and stairs. Measure every door, hallway, and turn between the truck and the final spot. Older HRM homes are notorious for tight entries.
  3. The clearances. Manufacturers specify minimum air gaps around fridges, ranges, and dishwashers. Leave them, or the appliance overheats and wears out early.
Homeowner measuring a kitchen cabinet opening before a new appliance installation in Halifax
Measure the opening, the doorways, and every turn on the path before the appliance arrives.

Did you know? Delivery does not always mean installation

Many retailers separate “delivery” from “installation,” and even a paid install often covers only the basics. Hooking up a water line, converting a gas range, or hauling away the old unit may cost extra or may not be included at all. Read the fine print before delivery day so you are not left with a new appliance sitting in the middle of the kitchen and no one to connect it.

Electrical and gas: the safety basics

Safety note: The tips here are for general guidance only. Max Appliance Repair Halifax is not responsible for any damage, injury, or cost resulting from action taken based on this content. Always unplug an appliance or switch off its breaker before you inspect it. Anything involving a gas line or a gas appliance (such as a gas dryer) must be handled by a licensed gas technician, and any wiring you are not certain about by a licensed electrician. If a step calls for tools, dismantling, or work you are not fully comfortable with, stop and call a qualified technician.

Most appliances simply plug in, but the details matter. A new dryer or range often needs a specific outlet and amperage, and many homes in Nova Scotia have an older receptacle that does not match a modern plug. Check that the outlet type, voltage, and breaker size match the appliance before delivery, not after.

  • Match the plug to the outlet. Dryers and ranges use 240-volt outlets, and the plug shape changed over the years. A mismatch is common in older homes.
  • Do not rely on adapters or extension cords. Large appliances should plug directly into a dedicated, properly rated outlet.
  • Confirm the breaker. An undersized breaker will trip, and an oversized one is unsafe. If you are unsure, have an electrician confirm it.

Gas appliances are not a do-it-yourself install

If you are installing a gas range, gas dryer, or gas cooktop, the connection to the gas line must be made by a technician licensed for gas work in Nova Scotia. A loose or improper fitting can leak, and a leak is dangerous. This is not a corner to cut to save an hour. You can position the appliance and check clearances yourself, but the gas hookup, the leak test, and any conversion between natural gas and propane belong to a licensed professional, full stop.

How to Maintain Kitchen Appliances | Ask This Old House

Water lines, drains, and leaks

Anything that uses water (a dishwasher, a fridge with an ice maker, or a washing machine) is where slow, expensive leaks begin. The connection looks fine on installation day and then weeps a few drops a week into the cabinet floor or behind the wall. By the time you notice the water damage, the repair is far bigger than the appliance.

  • Use new hoses. Reusing old, brittle washer hoses is a leading cause of laundry-room floods. Stainless braided hoses are worth the few dollars.
  • Check the dishwasher drain loop. The drain hose needs a high loop or air gap so dirty water cannot siphon back into the machine.
  • Snug, do not overtighten. Over-cranking a plastic fitting cracks it. Hand-tight plus a gentle quarter turn is usually right.
  • Run a test cycle and watch. Before you push the appliance back, run it once and look underneath with a flashlight for any drip.
Hands connecting a braided water supply hose and checking the drain behind a new dishwasher
Use new braided hoses, check the drain loop, and run a test cycle while you watch for leaks.

Save your floor: the bucket-and-towel test

Before you slide a new washer or dishwasher into its final spot, run a full cycle while the connections are still visible, with a towel underneath and a flashlight in hand. Five minutes of watching now can save you a warped cabinet, a stained ceiling below, or a mould problem later. Halifax homes with finished basements are especially vulnerable, because an upstairs leak shows up as a downstairs disaster.

Infographic of the five-zone appliance installation checklist for Halifax homeowners
The five zones to check on any install: fit, power, water, airflow, and level.

Airflow and clearances

Appliances make heat and need to shed it. A fridge pushed tight against a wall, a dryer with a crushed vent, or an oven boxed in without clearance all run hotter, work harder, and fail sooner. This is one of the most common things we see done wrong, because the appliance still works at first, so nobody worries.

  • Fridge: leave the manufacturer’s gap at the back, sides, and top so the coils can vent. A fridge with no breathing room runs warm and burns out the compressor.
  • Dryer: use a short, smooth, rigid or semi-rigid metal vent, not a long crushed accordion hose. A restricted vent is both an efficiency and a fire problem.
  • Range and oven: respect the side and overhead clearances, especially near cabinets and combustible materials.

A dryer vent done right on installation day saves you from the slow decline so many homes deal with later. If your dryer already runs hot or slow, our guide on choosing between gas and electric dryers covers venting in more depth, and our dryer repair team can sort a poor install.

Levelling and securing

A level appliance is a quiet, long-lived appliance. A washer that is even slightly off will walk and bang on the spin cycle, a fridge that leans can have a door that swings shut or fails to seal, and a wobbly range is a tip-over hazard. Older HRM floors are rarely perfectly flat, so this step matters more here than the manuals assume.

  • Use a real level. Adjust the feet front to back and side to side until the appliance does not rock.
  • Install the anti-tip bracket on ranges. It ships in the box for a reason and is a genuine safety device, not an optional extra.
  • Secure stacked laundry. Stacking kits and brackets keep a stacked washer and dryer from shifting. If you are weighing a stacked setup, see whether any washer and dryer can be stacked together.

The details everyone forgets

These are the small things that never make the delivery crew’s list but cause most of the early callbacks we see across Halifax:

  • Removing shipping bolts. Front-load washers ship with transit bolts that must come out before the first cycle, or the machine will shake violently and damage itself. This is the single most forgotten step.
  • Peeling the protective film. Plastic film left on stainless or vents traps heat and looks terrible six months on.
  • The first-cycle rinse. Run an empty hot cycle on a new dishwasher or washer to clear manufacturing residue.
  • Registering the warranty. Two minutes online protects you for years and is easy to skip in the excitement of a new appliance.
  • Keeping the manual and model number. Snap a photo of the data plate. It makes any future service call faster and parts ordering accurate.
  • Hard-water and salt-air planning. In coastal Halifax, hard water and salt air shorten appliance life. A simple inline filter or a wipe-down routine pays off.

When to call a professional

Pricing note: The figures on this page reflect typical market rates in Halifax and the surrounding HRM as of 2026. What you actually pay depends on the brand and age of the appliance, the parts involved, and how easy the unit is to access. Always get a written quote or in-person diagnostic before committing to a repair.

Plenty of installs are well within reach of a handy homeowner: a plug-in fridge, a freestanding electric range, a washer with new hoses. Others are worth handing off. Here is roughly where the line sits and what professional help tends to cost in the Halifax area in 2026.

Install taskTypical Halifax cost (2026)DIY or pro?
Plug-in fridge, position and level$0 to $80DIY-friendly
Washer with new braided hoses$80 to $150DIY-friendly
Built-in dishwasher hookup$150 to $300Pro recommended
Electric range, outlet match$80 to $200DIY if outlet matches
Gas range or gas dryer connection$150 to $350Licensed tech only
Dryer vent run, new or rerouted$150 to $350Pro recommended

Max Appliance Repair Halifax is the city’s most trusted and highest-reviewed appliance repair company, with over 1,200 verified Google reviews. We install and service appliances across Halifax, Bedford, Dartmouth, Sackville, and Tantallon and Timberlea, and we are licensed for gas work in Nova Scotia.

Sources and further reading

  • Max Appliance Repair Halifax, in-house installation and service-call data, 2026 HRM pricing observations.
  • U.S. Fire Administration, general guidance on dryer venting and clothes dryer fire prevention.
  • This Old House, “How to Maintain Kitchen Appliances | Ask This Old House” (video, embedded above).

Frequently asked questions

What is the most commonly forgotten step in appliance installation?

Removing the shipping bolts from a front-load washer. These transit bolts hold the drum still during delivery and must be taken out before the first wash. Run the machine with them in and it will shake violently, walk across the floor, and can damage the drum and bearings. Right behind that are skipping the dishwasher drain loop, leaving protective film on stainless steel, and forgetting to register the warranty. None of these affect day one, which is exactly why they get missed, and why they cause early problems.

Can I install a gas appliance myself in Nova Scotia?

No. The connection of any gas appliance, including a gas range, gas dryer, or gas cooktop, to the gas line must be done by a technician licensed for gas work in Nova Scotia. A loose or improper gas fitting can leak and is a serious safety hazard. You can safely position the appliance, check clearances, and measure your space, but the actual gas hookup, the leak test, and any conversion between natural gas and propane have to be handled by a licensed professional. It is not worth the risk to save an hour of labour.

Do I need new hoses when installing a washing machine?

Yes, you should use new hoses. Old rubber washer hoses become brittle and are one of the leading causes of laundry-room floods, sometimes years after they look fine. Stainless steel braided hoses cost only a few dollars more and resist bursting far better. While you are at it, check that the connections are snug but not overtightened, and run one cycle with a towel underneath and a flashlight to confirm there are no drips before you push the machine back into place. It is cheap insurance against expensive water damage.

How much clearance does a new refrigerator need?

Most refrigerators need a gap at the back, sides, and top so the coils and compressor can shed heat. Check your model’s manual for the exact figures, but a common guideline is leaving an inch or so on each side and above, plus space behind for airflow. A fridge crammed tight into an alcove runs warm, works harder, uses more electricity, and can wear out the compressor early. Leaving the recommended clearances is one of the simplest ways to make a new fridge last and to keep your Nova Scotia Power bill in check.

Should I pay for professional appliance installation or do it myself?

It depends on the appliance. A plug-in fridge, a freestanding electric range with a matching outlet, or a washer with new hoses are reasonable do-it-yourself jobs. A built-in dishwasher, a dryer vent run, an outlet that does not match, or anything involving gas is worth a professional. In the Halifax area, professional help typically runs from under a hundred dollars for simple positioning to a few hundred for a dishwasher or a gas connection in 2026. Gas connections are not optional to hire out; they legally require a licensed technician.

What to do next

A successful appliance install is really just five quick questions answered before the crew leaves: does it fit, is the power right, are the water connections dry, can it breathe, and is it level and secure. Answer those and you will skip the early-failure calls that fill our schedule every month.

  • Measure the opening and the whole path in before you buy.
  • Confirm the outlet, breaker, and any gas connection, and hire a licensed tech for gas.
  • Use new hoses, check the drain loop, and run a test cycle while you watch for leaks.

Download the free quick guide

Take our printable five-zone checklist on delivery day so nothing gets missed before the crew drives away.

Download the appliance installation checklist

Installing a new appliance in Halifax or the HRM?

Let us handle the parts that cause the most callbacks: dishwasher hookups, dryer vents, levelling, and licensed gas connections. Book an install or service for your dishwasher, range, or washer, or contact our team. We are Halifax’s most trusted, highest-reviewed appliance repair company, with over 1,200 verified Google reviews.

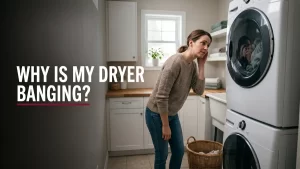
What Does a Loud Banging Noise From My Dryer Mean in 2026?

Dryer making a loud banging noise, a homeowner listening to a noisy clothes dryer in a Halifax laundry room

It usually starts in the middle of a load. A steady hum turns into a heavy thud, thud, thud that you can hear from the next room, and suddenly the whole laundry area is shaking. A dryer making a loud banging noise is one of the most common calls we get from Halifax homes, and the good news is that the sound itself is a clue. The bang almost always points to a specific worn part, and once you know which one, you know whether this is a quick fix or a job for a technician. If the noise has already turned into grinding or burning smells, skip ahead and book dryer repair in Halifax rather than running another load.

This guide walks through what a banging dryer is actually telling you in 2026, which causes you can safely check yourself, and where the line is between a do-it-yourself afternoon and a service call. We will keep it practical and Halifax-specific, because salt air and older HRM laundry rooms add a few wrinkles that the generic videos online never mention.

What a banging noise actually means

A dryer drum is a big metal cylinder that spins on a system of rollers, glides, and a belt, all driven by a motor. When every part is healthy, the drum turns smoothly and you hear a soft, even tumble. A bang is the sound of something interrupting that rotation: a flat spot on a roller, a worn glide letting the drum drop, or an object trapped where it should not be. The rhythm tells you a lot. A bang that repeats once per drum rotation is mechanical and predictable, while a random clatter is usually something loose tumbling around.

So before you assume the worst, listen for the pattern. Take everything out and run the dryer empty for ten seconds. If the bang is still there, the problem is inside the machine. If it disappears, the culprit was in the laundry.

Halifax homeowner listening to a noisy clothes dryer in a basement laundry room
Run the dryer empty for a few seconds. If the bang stays, the issue is inside the machine.

Stop the dryer if you smell burning or see smoke

A banging noise paired with a hot, burning, or rubbery smell is not a wait-and-see situation. Lint is highly flammable, and a seized drum or failing motor can overheat fast. Turn the dryer off at the wall, unplug it if you safely can, and do not run it again until it has been inspected. Clothes dryers are a recognized cause of home fires, and the warning signs are almost always heat and noise together.

The most common causes of a banging dryer

After years of service calls across the HRM, the same short list explains the vast majority of banging dryers. Here they are, roughly in order of how often we see them:

  1. Worn drum rollers (support rollers). These small wheels carry the drum. Over time they develop flat spots or the bearings dry out, so each rotation drops the drum slightly and you hear a thump. This is the number one cause we find.
  2. A worn or shredded drum belt. The belt wraps the drum and the motor pulley. As it frays, lumps and tears slap against the drum and cabinet with every turn.
  3. Failing idler pulley or tensioner. This keeps the belt tight. When its bearing wears, it squeals, then bangs as it wobbles.
  4. Worn drum glides or bearings. Front glides and the rear drum bearing keep the drum centred. When they wear, the drum shifts and knocks against the housing.
  5. Loose or off-balance load. A bunched-up duvet or a single heavy towel can thump like a machine fault, especially in compact stacked units.
  6. Foreign objects. Coins, zippers, underwire, or a stray screw caught in the drum seam or the lint area produce a sharp, irregular clang.

People often ask: can I keep using a dryer that bangs?

You can run a single short load to confirm the symptom, but you should not keep using a dryer that bangs load after load. A worn roller or belt that is left alone will eventually fail completely, and a seized drum can damage the motor, which turns a fifty-dollar part into a much bigger repair. More importantly, the same wear that causes noise often restricts airflow and traps lint, which raises the fire risk. Treat a persistent bang as a deadline, not a suggestion.

Electric Dryer Making Loud Noise: Top Reasons and Fixes

Checks you can safely do yourself

Safety note: The tips here are for general guidance only. Max Appliance Repair Halifax is not responsible for any damage, injury, or cost resulting from action taken based on this content. Always unplug an appliance or switch off its breaker before you inspect it. Anything involving a gas line or a gas appliance (such as a gas dryer) must be handled by a licensed gas technician, and any wiring you are not certain about by a licensed electrician. If a step calls for tools, dismantling, or work you are not fully comfortable with, stop and call a qualified technician.

You do not need to take the dryer apart to narrow down the problem. A few simple, no-tools checks rule out the easy causes and tell you whether you are looking at a five-minute fix or a service call. Always unplug an electric dryer first, or switch off its breaker, before you reach inside.

  • Empty the drum and run it. If the bang vanishes, you had an off-balance load or a trapped item. Problem solved.
  • Check the lint trap and the seam. Pull the lint screen, shine a light into the slot, and feel around the rubber drum seal for coins or hardware.
  • Level the machine. A dryer that rocks on an uneven HRM basement floor will bang under load. Adjust the feet so it sits dead solid.
  • Listen for the rhythm. One thump per rotation usually means a roller or glide. A slapping or squealing sound leans toward the belt or idler pulley.
Close-up of a technician checking the drum belt and rollers inside an open clothes dryer
Worn drum rollers and a frayed belt are the two most common reasons a dryer starts to bang.

Pro tip: the spin-by-hand test

With the dryer unplugged and the front or top panel off, give the drum a slow spin by hand. A healthy drum turns quietly and freely. If you feel a catch, hear a grind, or see the drum dip at one point in the rotation, you have found your worn roller or glide without ever running the motor. If you are not comfortable opening the cabinet, that is completely fine, and it is exactly where most people hand the job to a technician.

When to stop and call a technician

Some banging dryers are a tidy do-it-yourself job. Others are not worth the risk or the time, especially once you factor in sourcing the right part for your exact model. Call a professional when:

  • The noise comes with heat, a burning smell, or any sign of smoke.
  • The drum will not turn freely by hand, which points to a seized bearing or motor.
  • You have a stacked or compact unit where the parts are tightly packed and hard to reach.
  • The repair needs the rear bulkhead or motor removed, which is fiddly and easy to damage.
  • It is a gas dryer and the work goes anywhere near the burner or gas line (more on that below).

Max Appliance Repair Halifax is the city’s most trusted and highest-reviewed appliance repair company, with over 1,200 verified Google reviews from homeowners across the HRM. Our technicians carry common dryer parts on the van, so a banging drum is often a same-visit fix. We cover Halifax along with Bedford, Dartmouth, Sackville, and Tantallon and Timberlea.

Gas dryers need extra caution

Gas dryer work belongs to a licensed technician

If you have a natural-gas or propane dryer, the noise diagnosis above still applies, but the repair does not. Anything that involves the burner assembly, the gas valve, or the supply line must be done by a technician licensed for gas work in Nova Scotia. A loose gas connection is not something to test by feel, and a do-it-yourself attempt can lead to a leak. You can still safely empty the drum, level the machine, and listen for the rhythm, but once the cabinet comes off a gas dryer, stop and call a pro.

Not sure which type you have? If your dryer has a 240-volt outlet with a large plug, it is electric. If there is a small gas line running to the back, it is gas. When you are weighing your options on a future replacement, our guide to gas versus electric dryers for Halifax homes breaks down the running costs and the venting differences.

Infographic decoding dryer banging noises by sound pattern and likely cause
Match the sound to the cause: a quick decoder for what your dryer is telling you.

What a noisy dryer repair costs in Halifax

Pricing note: The figures on this page reflect typical market rates in Halifax and the surrounding HRM as of 2026. What you actually pay depends on the brand and age of the appliance, the parts involved, and how easy the unit is to access. Always get a written quote or in-person diagnostic before committing to a repair.

The parts behind a banging dryer are usually inexpensive; the cost is mostly labour and the diagnostic. The ranges below are typical 2026 figures for the Halifax area to help you sanity-check a quote, not firm prices.

RepairTypical Halifax cost (2026)DIY-friendly?
Diagnostic / service call$90 to $130n/a
Drum roller set replacement$160 to $280Moderate
Drum belt replacement$150 to $260Moderate
Idler pulley replacement$150 to $250Moderate
Rear drum bearing / glide kit$200 to $340Harder
Remove trapped object$90 to $150Often DIY

If the dryer is more than ten to twelve years old and needs a bearing plus a belt plus rollers all at once, it is worth pausing to think. Our honest take on whether to repair or replace an appliance can help you decide, and you can compare the full picture in our 2026 Halifax appliance repair cost guide.

How to keep your dryer quiet

  • Clean the lint trap every load. Lint buildup strains the motor and traps heat, which wears parts faster.
  • Have the vent cleaned yearly. A clogged vent makes the dryer work harder and longer, accelerating roller and belt wear, and it is a real fire risk in older HRM homes.
  • Do not overload. Cramming the drum stresses the belt and bearings and throws loads out of balance.
  • Empty pockets before drying. Coins and hardware are the single most common trapped-object culprit.
  • Keep it level. Re-check the feet after any move, since a dryer that rocks will bang and wear unevenly.

Sources and further reading

  • Max Appliance Repair Halifax, in-house service-call data and 2026 HRM pricing observations.
  • U.S. Fire Administration and National Fire Protection Association, general guidance on clothes dryer fire risk and lint buildup.
  • AppliancePartsPros, “Electric Dryer Making Loud Noise: Top Reasons and Fixes” (video, embedded above).

Frequently asked questions

Why does my dryer bang once every time the drum goes around?

A bang that repeats on a steady beat, once per drum rotation, is the classic signature of a worn drum roller or a flat spot on a glide. The drum drops slightly at the same point each turn, producing that rhythmic thump. It can also be a frayed belt with a lump in it slapping the cabinet. Because the pattern is so consistent, it is one of the easier noises to diagnose. Unplug the dryer, spin the drum by hand, and feel for the catch. If you find it, a roller or belt kit is usually the fix.

Is it safe to keep running a dryer that makes a banging noise?

For one short load to confirm the problem, yes. As an ongoing habit, no. A worn roller or belt only gets worse, and ignoring it can let the drum seize and damage the motor, turning a small part into a major repair. The same wear often restricts airflow and traps lint, which raises the fire risk. If the banging comes with heat, a burning smell, or smoke, stop immediately, unplug the dryer, and have it inspected before you run it again.

Can I fix a banging dryer myself?

Often, yes, if you are comfortable unplugging the machine and removing a panel. Trapped objects, an off-balance load, and an unlevel dryer are easy fixes. Drum rollers and belts are a moderate job if you can source the exact part for your model. Where it gets tricky is a rear drum bearing, a tightly packed stacked unit, or anything on a gas dryer. Gas work must be left to a licensed technician. When in doubt, a diagnostic visit costs far less than a repair done twice.

How much does it cost to fix a noisy dryer in Halifax?

Most banging-dryer repairs in the Halifax area run between roughly $150 and $340 in 2026, including parts and labour, depending on which component is worn. A trapped object or a simple level adjustment can be far less, while a rear bearing plus belt plus rollers on an older machine sits at the top of the range. A diagnostic visit is typically $90 to $130 and is often credited toward the repair. If an older dryer needs several parts at once, it may be worth comparing the repair cost against replacement.

Does salt air in Halifax affect my dryer’s parts?

It can, indirectly. Atlantic salt air speeds up corrosion on metal components and fasteners, and damp coastal basements add humidity that can swell or rust parts over time. While the rollers and belt wear mainly from use, a corroded fastener or a rusted drum support can fail sooner here than in a drier climate. Keeping the laundry area ventilated, the vent clean, and the dryer off a damp concrete floor all help your machine last longer in the HRM.

The bottom line

A banging dryer is rarely a mystery. The sound itself is the diagnosis: a steady thump points to rollers or a belt, a random clang means something is trapped, and any bang with heat or a burning smell means stop right now. Empty the drum, listen for the rhythm, and you will know within a minute whether this is a pocket-change fix or a call worth making. When it is the latter, do not wait for the part to fail completely.

Download the free quick guide

Keep our printable decoder handy so you can match the sound to the likely cause and know your next step in seconds.

Download the dryer noise diagnostic checklist

Dryer banging in Halifax or the HRM?

Do not let a small noise turn into a seized drum or a fire risk. Our technicians carry common dryer parts and fix most banging drums in a single visit. Book dryer repair, ask about your washer while we are there, or contact our team. We are Halifax’s most trusted, highest-reviewed appliance repair company, with over 1,200 verified Google reviews.

How Atlantic Salt Air Wrecks Halifax Appliances (and What Actually Slows It Down)

Atlantic salt air wrecks appliances

If you live anywhere from Eastern Passage and Herring Cove through the South End, Point Pleasant, Purcells Cove and out to Peggy’s Cove, you have probably noticed that appliances do not last as long in your kitchen as they do in your sister’s place in Bedford. That is not bad luck and it is not in your head. Salt-laden Atlantic air is one of the most aggressive environments a residential appliance ever sees, and it changes which parts fail first, how fast they fail, and what kind of appliance repair in Halifax actually holds up. Here is what 18 years of HRM service calls have taught us about which appliances die early near the water, and what you can do to slow it down.

Why salt air is so hard on appliances

Air within about 5 km of the open ocean carries microscopic salt aerosols, blown inland on every onshore breeze. Those particles settle on every surface in your home, including the inside of your fridge compartment when the door opens. Salt is hygroscopic, meaning it pulls moisture out of the air and holds it against any metal it touches. That moisture-plus-chloride combination is the worst possible enemy of stainless steel, aluminum, and the bare copper inside compressor windings. Corrosion that would take 15 years to show up in a Halton Hills kitchen shows up in 4 to 6 years on a fridge in Ferguson’s Cove.

Refrigerator condenser coil with dust and salt grit between the fins being cleaned with a soft brush
Pinpoint rust freckles forming on a stainless steel dishwasher panel from Halifax salt air exposure
Infographic showing the worst HRM zones for appliance corrosion from Atlantic salt air

Which appliances fail first near the harbour

1. Refrigerator condenser coils and compressors

The condenser coils on the back or underneath your fridge are bare aluminum or copper, and they are the first thing to corrode in a salt environment. Once the fins corrode and clog with the airborne grit they trap, the compressor cannot dump heat properly. It runs hotter, draws more current, and the windings start failing. We see compressor failures on Halifax peninsula homes at 7 to 9 years on appliances that should run 12 to 15. The fix is not the compressor, it is keeping the coils clean and dry. refrigerator repair jobs in the South End almost always start with a coil inspection.

2. Stainless steel front panels (the “rust spots” problem)

The stainless steel on your dishwasher front, oven door, and refrigerator door is not actually rust-proof. It is rust-resistant, and the resistance comes from a microscopic chromium oxide layer on the surface. Salt and chloride attack that layer, especially in scratches and around fingerprint smudges, and you get the brown pinpoint freckles that Halifax homeowners describe as “rust spots.” Once they start, they spread. The fix is a weekly wipe-down with mild soap and water followed by a dry cloth, and a stainless steel polish that contains mineral oil to seal the surface. Never use steel wool or an abrasive cleaner, both of which strip the chromium layer and accelerate the problem.

3. Washing machine and dryer cabinets

Front-load washers in basement laundry rooms in older South End homes corrode from the bottom up because basement air holds salt-bearing humidity all summer. The first thing to go is the bottom edge of the steel cabinet where the painted finish is thinnest. Then the spider arm holding the stainless drum to the rear bearing starts pitting, and once that happens you are looking at a $700 bearing-and-spider job on a 9 year old washer. Dryers fare slightly better but the heating element brackets and the metal lint duct corrode on the same timeline.

4. Dishwasher control boards and door latches

Modern dishwashers have a control board behind the door that sees humid air every cycle. In a Halifax peninsula kitchen, that board picks up a thin film of salt residue over a few years and starts throwing intermittent error codes. Door latches made of pot metal corrode and stick. We replace dishwasher control boards on Halifax homes at roughly twice the rate we replace them on Bedford or Hammonds Plains homes.

What actually slows the damage down

You cannot stop salt air from coming into your home, but you can change how it interacts with your appliances. The interventions that actually work in HRM:

  • Vacuum the back and bottom of your fridge every 4 months, not annually. Use a brush attachment to lift the salt-bearing dust off the condenser fins before it cakes on. This single habit doubles compressor life on Halifax peninsula homes in our service records.
  • Wipe stainless surfaces weekly with a damp cloth and dry them. Then apply a mineral oil based stainless polish once a month. The oil layer blocks salt from reaching the chromium oxide.
  • Run a dehumidifier in your basement laundry from May through October. Target 50 percent relative humidity. Cuts cabinet corrosion on washers and dryers by more than half in our anecdotal tracking.
  • Open kitchen and laundry windows on dry inland days, close them on humid east-wind days. Onshore Atlantic wind is when the salt aerosol is heaviest. North and west winds bring drier inland air that actively helps your appliances.
  • Service your appliances on a 5 year preventative cycle, not a “wait until it breaks” cycle. Coil cleaning, door seal inspection, and water inlet valve checks catch problems before they cascade.

Where in HRM the salt air problem is worst

From service call data, the heaviest corrosion zones are: Eastern Passage, Cow Bay, Herring Cove, Purcells Cove, the South End between Point Pleasant Park and the harbour, downtown Dartmouth waterfront, the Bedford Basin shoreline, and the entire South Shore from Sambro out toward Peggy’s Cove. Bedford north of Hammonds Plains Road, Sackville, and Fall River show appliance failure rates much closer to inland Canadian norms. The transition is roughly the 5 km mark from the open water, but topography matters: a home tucked behind a hill in Spryfield can see less salt deposition than one on an exposed slope in Clayton Park.

When corrosion-driven failures cross the repair-vs-replace line

If your appliance is under 8 years old, almost any salt-driven failure is worth repairing. Compressor swaps, control board replacements, washer bearing-and-spider rebuilds, dishwasher latch and door seal jobs all make sense up to that age. Past 10 years, the calculation gets harder, because a single visible failure usually means several other components are also corroding in the background. Our shop policy is to inspect every repair candidate over 10 years for secondary corrosion before quoting, so you do not pay for a $400 control board on a fridge that will need a $900 compressor in 8 months.

Frequently asked questions

Does living in Halifax really shorten appliance life that much?

Yes, especially within 5 km of the harbour or open Atlantic. Average residential appliance lifespans in our HRM service records run 25 to 40 percent shorter on the peninsula and the eastern shore than they do in inland HRM communities like Sackville or Hammonds Plains.

Will a stainless polish actually stop the rust spots on my dishwasher?

If you start before the spots appear, yes. A monthly application of a mineral oil based stainless polish blocks chloride from reaching the chromium oxide layer. If pinpoint corrosion has already started, polish will slow it but will not reverse it, and the affected panel will eventually need replacement.

Should I buy a different brand of fridge for a Halifax kitchen?

Brand matters less than how the condenser coil is positioned. Bottom-mount condensers (most modern French door models) are easier to keep clean than back-mount coils, which trap salt-bearing dust against the wall. Whatever you buy, plan to clean the coils every 4 months.

Is the salt air problem worse for gas or electric appliances?

Roughly equal for the cabinet and panels, but gas ranges and dryers have additional metal parts (burner orifices, gas valves, ignition electrodes) that corrode on a similar timeline. Electric ranges are simpler internally and tend to be slightly more forgiving.

How often should I have my appliances professionally serviced in Halifax?

Every 5 years for fridges, dishwashers, washers, and dryers. Every 3 years if you live within 1 km of the open water. The visit usually pays for itself in extended life and avoided breakdowns.

Get an honest assessment before salt air costs you a $2,500 replacement

Most Halifax appliance failures attributed to “the unit is just old” are actually slow-burn corrosion problems that could have been caught and stopped 2 years earlier. If you have an appliance acting up and you live anywhere near the water, book a Halifax service call and our technician will inspect for hidden corrosion before quoting. The Halifax Water hardness data confirms that homes near the harbour see different operating conditions than inland HRM, and your appliances need to be serviced accordingly.