Author Archives:

How to Read Your Nova Scotia Power Bill (and Spot Which Appliance Costs You the Most)

Electricity bill with magnifying glass and appliance cost chart

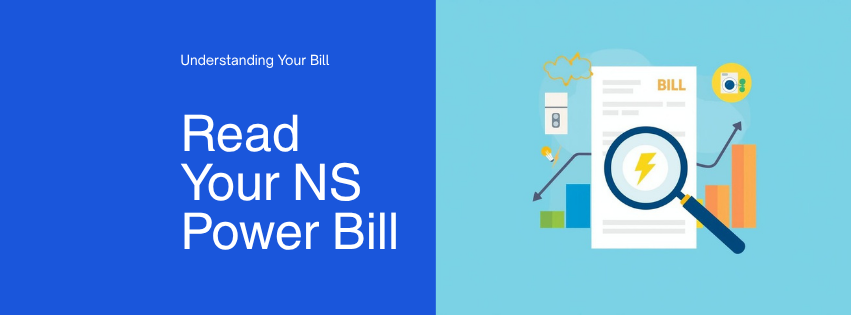
Most Halifax homeowners look at one number on their Nova Scotia Power bill: the total at the bottom. But your bill actually contains useful information that can help you understand where your money is going — and whether one of your appliances might be costing more than it should. Here is how to read it and use it.

Understanding Your NS Power Bill

Your residential bill has two main charges:

  • Base charge (customer charge): Currently $19.17 per month — a flat fee for being connected to the grid, regardless of how much electricity you use
  • Energy charge: Currently approximately 18.2 cents per kWh — the rate you pay for each kilowatt-hour consumed
Pro tip: The year-over-year comparison on your NS Power bill is one of the most useful numbers on the page. If your usage jumped significantly compared to the same month last year — with no obvious reason like a new appliance or more people in the home — something may be malfunctioning. A fridge with dirty coils or a dryer with a clogged vent can each add 25 to 35% to an appliance’s electricity consumption.

Your bill also shows total kWh usage for the billing period and often includes a same-period comparison from the prior year. For current rate details, check Nova Scotia Power’s residential rates page.

How Much Does Each Appliance Cost to Run?

Here is a breakdown of what common appliances cost per month at NS Power’s current rate. Actual costs vary by model age, efficiency, and usage habits.

Appliance Monthly Cost (est.) Notes
Electric hot water heater $40 to $80 Often the single biggest consumer in a Halifax home
Electric baseboard / space heating $50 to $200+ (winter) Varies hugely by home size and insulation
Electric dryer $10 to $20 One of the more expensive appliances per use
Second fridge (garage) $10 to $25 Older units cost significantly more
Central air conditioning $30 to $80 (summer) Less common in Halifax but growing
Refrigerator (main) $5 to $15 Runs 24/7 but efficient when coils are clean
Electric oven / range $5 to $12 Depends on how often you cook
Dishwasher $3 to $7 Most of the cost is heating the water
Washer $2 to $5 The machine itself uses little — hot water draw is the real cost
Phantom power (all devices) $4 to $8 Cable box and game console are biggest contributors

How to Spot an Appliance Problem on Your Bill

Did you know? Your NS Power bill is actually an early warning system for appliance problems. A sudden unexplained spike in kWh usage — 20% or more above the same month last year — often points to a specific malfunctioning appliance. The most common culprits are a fridge with dirty condenser coils, a dryer with a clogged vent, a hot water heater with a failing element, or a freezer with a bad door seal.

Sudden Usage Spike (No Lifestyle Change)

If your kWh usage jumped 20% or more compared to the same month last year and nothing changed in your household, one of your appliances may be malfunctioning. Most common causes:

  • Fridge with dirty condenser coils — compressor runs overtime, using 25 to 35% more power
  • Dryer with a clogged vent — takes multiple cycles to dry, doubling energy use
  • Hot water heater with a failing element — works harder to maintain temperature
  • Freezer with a bad door seal — warm air constantly entering, compressor runs non-stop

Gradual Increase Over Several Months

A slow, steady climb in usage often indicates an aging appliance losing efficiency — typically a fridge, freezer, or hot water heater. Cleaning fridge coils or servicing the appliance can often bring usage back down significantly.

Usage That Does Not Drop When You Are Away

If you go on vacation for two weeks and your usage barely drops, something is running that should not be — or running more than it should. Your fridge should be the only major appliance consuming significant power while you are away.

How to Track Which Appliance Is Using the Most

  1. Kill A Watt meter ($30 to $40): Plug individual appliances into this device and it measures exactly how much electricity they use over time. Available at Canadian Tire, Home Hardware, or Amazon.ca.
  2. Smart plugs with energy monitoring: Wi-Fi smart plugs from brands like TP-Link Kasa track real-time energy use through an app on your phone.
  3. NS Power’s MyAccount portal: Shows your daily and monthly usage patterns — if you see a spike on a specific day, think about what changed that day.

5 Quick Wins to Lower Your Appliance Energy Costs

  1. Clean your fridge coils — 15 minutes of work can save $30 to $60 per year at NS Power rates
  2. Clean your dryer vent — faster drying means fewer cycles and lower bills
  3. Run the dishwasher on eco mode — uses less water and lower heat
  4. Wash clothes in cold water — modern detergents work just as well in cold, and you save on water heating
  5. Use power bars for entertainment systems — kill phantom power with one switch flip

Think an Appliance Is Driving Up Your Bill?

We diagnose efficiency issues and malfunctions across all major brands. Same-day service across Halifax, Dartmouth, Bedford, and HRM.

Book a Diagnostic

or call (902) 904-5559

Frequently Asked Questions

What is the current Nova Scotia Power rate per kWh?

As of early 2026, Nova Scotia Power’s residential energy rate is approximately 18.2 cents per kWh. Your bill also includes a flat base charge of $19.17 per month regardless of usage. For the most current rates, check the Nova Scotia Power residential rates page. Rates have increased regularly in recent years, making appliance efficiency more important than ever for Halifax homeowners.

Why did my Nova Scotia Power bill go up suddenly?

If your usage jumped without a clear lifestyle change (new appliance, more people at home, extreme weather), a malfunctioning appliance is the most likely cause. The biggest offenders are a fridge or freezer with dirty condenser coils (25 to 35% more electricity), a dryer with a clogged vent (takes multiple cycles per load), or a hot water heater with a failing element. Clean your fridge coils and dryer vent first — these are free fixes that often resolve the spike immediately.

What appliance uses the most electricity in a Halifax home?

In most Halifax homes, electric baseboard heating and the hot water heater are the largest electricity consumers. Among kitchen and laundry appliances, the electric dryer uses the most power per use (2,500 to 4,000 watts per cycle). The fridge uses less per cycle but runs 24 hours a day. A garage fridge or chest freezer can add $10 to $25 per month. Phantom power from entertainment devices typically adds $4 to $8 per month across an entire household.

How can I find out which appliance is using the most electricity?

The most accurate method is a Kill A Watt meter ($30 to $40 at Canadian Tire or Amazon.ca) — plug each appliance in and measure its actual consumption over a week. For always-on appliances like fridges, one week gives you reliable data. Smart plugs with energy monitoring (TP-Link Kasa, Emporia) can track multiple appliances continuously through an app. NS Power’s MyAccount portal also shows daily usage patterns that can help you narrow down which appliance changed.

Does a fridge running constantly mean it needs repair?

Not necessarily — but it is worth investigating. A fridge that runs constantly without cycling off is usually caused by one of three things: dirty condenser coils (most common and free to fix), a failing door seal letting warm air in, or a refrigerant or compressor issue requiring a technician. Start with the free fixes: clean the coils and check the door seals. If the compressor still runs non-stop after those steps, call Max Appliance Repair at (902) 904-5559 for a same-day diagnosis.

Related Posts

What Happens If You Never Clean Your Fridge Coils?

How dirty coils add to your NS Power bill and shorten compressor life

Phantom Power Explained

What standby power costs you every month in Nova Scotia

Can You Stack Any Washer and Dryer Together? What Halifax Condo Owners Need to Know

Stacked washer and dryer in compact condo laundry space

Space is tight in many Halifax apartments and condos. Stacking your washer and dryer is one of the best ways to free up floor space — but you cannot just place any dryer on top of any washer and hope for the best. Here is what you need to know before you stack.

Can You Stack Any Washer and Dryer?

No. Several requirements must be met:

Did you know? Never stack without a proper stacking kit. Using plywood, rubber mats, or just setting the dryer on top without securing it is dangerous. During a spin cycle, the vibration can cause the dryer to walk off the edge — a falling dryer weighs 55 to 75 lbs and can cause serious injury or damage. A stacking kit costs $30 to $80 and takes about 30 minutes to install.
  • Both units must be front-loading — you cannot stack a top-load washer (the lid would be blocked). The dryer always goes on top.
  • They should be the same brand and ideally the same width — stacking kits are designed for specific model combinations. A Samsung dryer on an LG washer may not have a compatible kit.
  • You need a stacking kit — a metal bracket that bolts the dryer securely to the top of the washer.
  • The washer must support the weight — a standard dryer weighs 55 to 75 lbs. Front-load washers from major brands are designed to handle this, but compact or budget models may not be rated for stacking.

What Is a Stacking Kit?

A stacking kit is a metal bracket — sometimes with a pull-out shelf — that physically connects the dryer to the washer. It typically costs $30 to $80 and is specific to certain washer and dryer model pairs. Common kits by brand:

Brand Common Stacking Kit Notes
Samsung SK-5A, SK-5AXAA Fits most 27″ Samsung front-loaders
LG STKIT-WH, KSTK1 Designed for LG front-load pairs
Whirlpool / Maytag W10869845, W10882520 Compatible across both brands (same manufacturer)
Bosch WTZ20410 For compact 24″ Bosch pairs — popular in Halifax condos

Ventilation Considerations for Halifax Condos

Vented Dryers

Standard dryers need an exhaust vent to the outside. In a condo, this means access to an exterior wall or a shared exhaust duct. If your laundry closet does not have a vent connection, a standard dryer is not an option regardless of how you stack it.

Ventless and Condensing Dryers

These dryers do not need an exterior vent. They condense moisture into water and either pump it down a drain or collect it in a tank you empty. They are ideal for condos without vent access. Bosch, Miele, and LG all make popular ventless models.

Heat Pump Dryers

Pro tip: Heat pump dryers are the most condo-friendly option — ventless, energy-efficient (40 to 50% less electricity than conventional), and they generate less heat than condenser dryers, which matters in a small laundry closet. They cost more upfront ($900 to $1,500) but the running cost advantage adds up quickly at Nova Scotia Power rates.

Common Stacking Mistakes

  1. Not levelling the washer first — the washer must be perfectly level before stacking; an unlevel base means an unlevel dryer, which causes excess vibration and potential damage
  2. Forgetting to remove transit bolts — new washers ship with transport bolts that lock the drum; if you forget to remove them, the washer will vibrate aggressively and can damage itself and the dryer above
  3. Using the wrong stacking kit — universal kits exist but are not always reliable; brand-specific kits are always the safer choice
  4. Blocking airflow — stacked units in a tight closet need ventilation; leave the closet door open or louvered during operation; heat buildup can affect dryer performance and trigger thermal shutoffs
  5. Ignoring the floor — stacked units are heavy (200+ lbs combined); make sure the floor can handle the weight and vibration, especially in older Halifax buildings

Compact 24″ vs Standard 27″ — What Fits in Your Space?

In many Halifax condos, the laundry closet only fits 24-inch compact units. Measure your space carefully — including height. Stacked 27″ units are about 76 to 80 inches tall, which can be tight with overhead shelving or low-hanging pipes.

  • 24″ compact (Bosch, Miele, Electrolux): Approximately 2.2 to 2.4 cu.ft washer capacity. Good for 1 to 2 people. Excellent build quality but smaller loads.
  • 27″ standard (Samsung, LG, Whirlpool): Approximately 4.5 to 5.8 cu.ft washer capacity. Better for families. Requires more floor space and ceiling height.

Washer or Dryer Issues in Your Stacked Setup?

We service all brands and configurations — stacked compact units, full-size pairs, ventless dryers. Same-day across HRM.

Book a Technician

or call (902) 904-5559

Frequently Asked Questions

Can I stack a Samsung dryer on an LG washer?

Not recommended. Stacking kits are brand-specific — a Samsung stacking kit is designed to connect a Samsung dryer to a Samsung washer using their specific mounting points and dimensions. Mixing brands means no compatible stacking kit exists, so the dryer would sit unsecured on top of the washer. During a spin cycle, an unsecured 60-lb dryer can vibrate off the edge. If you are buying a new pair specifically to stack, buy matching brands.

Do I need a special dryer for a condo without a vent?

Yes. If your condo laundry closet does not have an exterior exhaust duct, you need a ventless dryer — either a condensing dryer or a heat pump dryer. Both work without venting to the outside. Condensing dryers collect moisture in a tank you empty (or drain via a hose). Heat pump dryers do the same but use significantly less electricity. Bosch, Miele, and LG all make popular ventless models compatible with stacking kits.

What happens if you stack a dryer without a stacking kit?

The dryer will be unsecured on top of the washer. During a spin cycle, the washer vibrates significantly — enough to cause an unsecured dryer to walk toward the edge and fall. A 55 to 75 lb dryer falling off a pedestal height can cause serious injury and significant damage to the floor and both appliances. Stacking kits cost $30 to $80 and take about 30 minutes to install. It is not worth skipping.

How do I know what stacking kit fits my washer and dryer?

Look up your washer and dryer model numbers (usually on a sticker inside the door frame) and search the manufacturer’s website or a parts retailer for compatible stacking kits. Samsung, LG, Whirlpool, and Bosch all list compatible kits by model number on their parts pages. If you are unsure, call the manufacturer’s parts line with both model numbers and they can confirm compatibility.

How much height do stacked washer and dryer units need?

Standard 27-inch washer and dryer pairs stacked together are typically 76 to 80 inches tall (roughly 6.5 feet). Add 2 to 4 inches for the stacking kit. In a standard 8-foot ceiling room, this works fine, but measure carefully if you have overhead shelving, pipes, or a lowered ceiling in the laundry closet. Compact 24-inch stacked pairs are shorter — typically 68 to 72 inches — and better suited to tight condo laundry closets.

Related Posts

Gas vs Electric Dryer for Halifax Homes

Running costs, installation, and which makes sense in NS

Why Your Washing Machine Stinks and How to Fix It

Causes, cleaning steps, and prevention tips

What Happens If You Never Clean Your Refrigerator Coils?

Refrigerator with dusty condenser coils and warning symbol

Quick question: when was the last time you cleaned your refrigerator’s condenser coils? If you are like most people, the answer is never. And that is a problem — because dirty condenser coils are the number one preventable cause of refrigerator failure. Our technicians see it constantly across Halifax: a fridge that stopped cooling, and behind it a thick mat of dust, pet hair, and kitchen grease coating the coils.

What Do Condenser Coils Actually Do?

Your fridge works by circulating refrigerant through a sealed system. The condenser coils are where heat gets released — think of them as the fridge’s radiator. They dissipate the heat pulled from inside the fridge out into the room. When these coils are clean, heat transfers efficiently and the compressor does not have to work hard. When they are coated in debris, the heat cannot escape — and that is when the problems begin.

The 4 Stages of Dirty Coils

Stage 1: Higher Electricity Bills

The compressor runs longer and more frequently to maintain the same temperature. A fridge with dirty coils can use 25 to 35% more electricity than the same fridge with clean coils. At Nova Scotia Power’s rates, that is an extra $30 to $60 per year on a standard fridge.

Stage 2: The Fridge Runs Constantly

Instead of cycling on and off as normal, the compressor starts running almost non-stop because it cannot dissipate heat efficiently. You might notice the fridge feels warm on the sides or back, or that it is louder than usual.

Stage 3: Food Starts Warming Up

Did you know? Many Halifax homeowners call us for a fridge not cooling — convinced it needs a new thermostat, fan, or compressor — and the real culprit is simply dirty condenser coils. After a 15-minute coil cleaning, the fridge often returns to normal temperature within a few hours. Always clean the coils before diagnosing more expensive problems.

The fridge can no longer maintain its set temperature. Fresh food spoils faster. The freezer may still feel cold, but the fridge section creeps above 4°C. This stage is often mistaken for a thermostat or fan failure.

Stage 4: Compressor Overheats and Fails

This is the expensive outcome. A compressor forced to run continuously at elevated temperatures will eventually overheat and fail. Compressor replacement costs $400 to $800+ depending on the brand — and on older fridges it is often not worth the repair. The irony: it could have been prevented with 15 minutes of cleaning twice a year.

How to Clean Your Fridge Coils (15 Minutes)

Pro tip: A coil cleaning brush ($10 to $15 at any hardware store) makes this job much easier. It is a long, narrow brush designed to fit between the coil fins without bending them. Pair it with a vacuum and the whole job takes under 15 minutes. Buy one and keep it with your cleaning supplies.

Step 1: Find the Coils

  • Bottom-mount coils (most common in newer models): Behind a kick plate or grille at the front bottom of the fridge. Snap or unscrew the grille to access them.
  • Rear-mount coils (older models): Visible on the back of the fridge. Pull the fridge away from the wall to access.

Step 2: Unplug the Fridge

Always unplug before cleaning the coils. This is a safety measure and also stops the fan from blowing dust around while you work.

Step 3: Vacuum and Brush

Use the vacuum brush attachment to remove loose dust and debris. For stubborn buildup between the coil fins, use a coil cleaning brush. Work from the centre outward and vacuum as you go.

Step 4: Clean the Surrounding Area

Vacuum the floor area beneath and behind the fridge. Dust bunnies here get pulled into the coils by the condenser fan and undo your cleaning within weeks.

Step 5: Plug Back In

Push the fridge back, plug it in, and you are done. The fridge should return to normal operating temperature within a few hours.

How Often Should You Clean Them?

Household Type Cleaning Frequency
Standard (no pets) Every 6 to 12 months
Homes with pets Every 3 to 4 months
Dusty environments (renovations, garage, basement) Every 3 months

Signs Your Coils Need Cleaning Right Now

  • The fridge feels warm on the outside (sides or back)
  • The compressor seems to run constantly — you hear it humming non-stop
  • Food is not staying as cold as it used to
  • The fridge is more than a year old and you have never cleaned the coils
  • You have pets and there is visible dust or hair near the bottom grille

Fridge Still Not Cooling After Coil Cleaning?

The compressor or another component may need attention. Same-day fridge repair across all of HRM.

Book a Technician

or call (902) 904-5559

Frequently Asked Questions

Where are the condenser coils on my refrigerator?

On most fridges made after 2000, the condenser coils are at the bottom front, behind a kick plate or grille you can snap or unscrew off. On older models and some higher-end units, the coils are on the back of the fridge — pull the fridge away from the wall and you will see a grid of black tubing. If you are unsure, check the owner’s manual or look up your model number online.

How do I know if dirty coils are causing my fridge problems?

The clearest sign is a fridge that runs constantly but cannot maintain temperature. If the outside of the fridge feels unusually warm, if the compressor never seems to turn off, or if food in the fridge section is warmer than it should be while the freezer still seems okay — dirty coils are the most likely cause. Clean them first before calling for service. Many fridges return to normal within a few hours of a coil cleaning.

Can dirty condenser coils cause a refrigerator to stop working completely?

Yes. If the coils are severely clogged and the compressor overheats repeatedly, it will eventually fail completely — the fridge will go silent and stop cooling entirely. A compressor replacement costs $400 to $800+ and is often not economical on older units. This is entirely preventable with regular coil cleaning. Once the compressor fails from heat stress, cleaning the coils at that point will not revive it.

How much electricity do dirty fridge coils waste in Nova Scotia?

A fridge with significantly dirty coils can use 25 to 35% more electricity than the same fridge with clean coils. At Nova Scotia Power’s rate of approximately 18.2 cents per kWh, a standard fridge normally costs $5 to $15 per month to run. Dirty coils can push that to $7 to $20 per month — an extra $24 to $60 per year. Cleaning the coils is free and the payback is immediate.

Should I hire a technician to clean my fridge coils?

Coil cleaning is a straightforward DIY task most homeowners can handle in 15 minutes with a vacuum and coil brush. If the fridge is still not cooling after you have cleaned the coils, or if you are uncomfortable pulling the appliance out and working around it, a technician can clean the coils as part of a service visit and diagnose whether a deeper problem is present. Max Appliance Repair Halifax offers same-day fridge service — call (902) 904-5559.

Related Posts

How Long Should a Refrigerator Last?

Average lifespan by brand and what affects longevity

Samsung Fridge Not Cooling?

Coils, error codes, and when to call a technician

What’s That Smell? Why Your Washing Machine Stinks and How to Fix It

Illustrated washing machine with odor symbols

You pull your clothes out of the washer expecting that fresh-laundry smell — and instead get hit with something musty, sour, or downright foul. If your washing machine smells bad, you are not alone. It is one of the most common complaints we hear from Halifax homeowners, and it almost always has the same small set of causes. The good news: it rarely means anything is mechanically broken.

Why Does My Washing Machine Smell?

The short answer: mould, mildew, and bacteria. Your washer is a warm, damp, enclosed space — the perfect breeding ground. Here is what creates the conditions:

1. The Door Gets Closed Between Loads

Did you know? Front-load washers are significantly more prone to mould odour than top-loaders because the door gasket creates a deep rubber pocket where water pools and sits after every cycle. Samsung, LG, and Whirlpool front-loaders are the most common washers we see with odour complaints in Halifax. The fix is the same for all of them: leave the door ajar after every wash.

This is the single biggest cause. When you close the door after a wash cycle, moisture gets trapped inside the drum and rubber gasket. Within hours, mould begins to grow. Front-load washers are especially prone because the door seal creates a pocket where water sits.

2. Too Much Detergent

Using more soap does not make clothes cleaner — it creates excess residue that coats the inside of the drum, door seal, and drain system. This soapy film becomes a food source for mould and bacteria. If you are using a front-loader or HE (high-efficiency) machine, you need HE detergent and less of it than you think. Most people use 2 to 3 times the required amount.

3. Only Cold Washes

Cold and warm cycles are great for saving energy and protecting fabrics. But if you never run a hot cycle, bacteria and soap scum build up over time without anything to kill them off. Running one hot cycle per week — even an empty drum clean — makes a significant difference.

4. Standing Water in the Drain System

A partially clogged drain pump or kinked drain hose can leave small amounts of water sitting in the system between cycles. This stagnant water turns foul quickly and the smell gets carried into the drum on the next wash.

How to Get Rid of the Smell

Step 1: Run a Cleaning Cycle

Most modern washers have a dedicated Clean or Tub Clean cycle. Run it with one of these:

  • Option A: 1 cup of white vinegar in the drum plus half a cup of baking soda in the detergent dispenser
  • Option B: A commercial washing machine cleaner tablet (Affresh, Tide Washing Machine Cleaner)

Use the hottest, longest cycle available with no clothes in the machine.

Step 2: Clean the Door Seal (Front-Loaders)

Pro tip: Peel back the rubber gasket around the door and you will likely find a ring of black mould, hair, and grime hiding in the folds. Clean it with equal parts white vinegar and water, or a diluted bleach solution (1 part bleach to 10 parts water). Use an old toothbrush to get into the deep folds, then wipe completely dry. This is the most effective single step for front-loader odour.

Step 3: Clean the Detergent Dispenser

Pull out the detergent drawer — most slide out completely — and soak it in hot soapy water. Scrub off any residue or mould. Also clean inside the housing where the drawer sits; this area accumulates buildup that is easy to miss and is a common odour source.

Step 4: Clean the Drain Filter

Front-load washers have a small drain filter usually behind a panel at the bottom front. Place a towel underneath (water will come out), unscrew the filter, and clean out any debris — coins, hair ties, and lint are common finds. This spot also accumulates odour-causing buildup that a drum cleaning cycle cannot reach.

How to Prevent the Smell from Coming Back

  1. Leave the door open after every wash — even just slightly ajar; this is the single most effective prevention step
  2. Wipe the door seal dry after each use — takes 10 seconds and prevents mould growth in the gasket folds
  3. Use the right amount of HE detergent — follow the measuring lines on the cap; more is not better
  4. Run a hot cleaning cycle monthly — with vinegar, baking soda, or a commercial cleaner
  5. Do not leave wet clothes sitting — transfer to the dryer promptly after the cycle ends
  6. Clean the drain filter quarterly — takes 5 minutes and prevents both odour and drainage problems

When the Smell Means Something Is Actually Wrong

In rare cases, a persistent smell that will not go away with cleaning indicates a real mechanical problem:

  • Rotten egg smell: Could indicate a drain issue or sewer gas backup through an improperly installed drain hose (missing high loop or air gap)
  • Burning smell: Motor issue, worn belt, or electrical fault — stop using the washer and call for washer repair immediately
  • Smell returns within days of deep cleaning: Mould may have penetrated the outer tub, drain hose, or areas you cannot reach without disassembly

If you have tried all the cleaning steps above and the smell persists, it is time for a professional inspection. Sometimes the outer drum or drain system needs to be disassembled and cleaned or replaced — not a DIY job.

Washer Smelling Bad Even After Cleaning?

We diagnose and fix persistent washer odour issues for all brands. Same-day service across HRM.

Book a Technician

or call (902) 904-5559

Frequently Asked Questions

Why does my front-load washer smell even after cleaning?

If the smell returns quickly after a cleaning cycle, the mould has likely penetrated beyond what a drum clean can reach — specifically the outer tub behind the drum, the drain hose, or deep inside the door gasket folds. The first step is to manually clean the door gasket with a toothbrush and bleach solution and the drain filter at the bottom front. If that does not resolve it, the outer tub and drain components may need to be disassembled and cleaned or replaced by a technician.

Can too much detergent cause a washing machine to smell?

Yes — this is one of the most common causes. Excess detergent that does not fully rinse out coats the drum, door seal, and drain system with a soapy film. This residue becomes a food source for bacteria and mould. HE front-loaders need HE detergent used in much smaller quantities than people typically use. If you have been overdosing detergent, run 3 to 4 empty hot cycles to flush the residue, then use the correct amount going forward.

How do I clean the filter on my front-load washing machine?

The drain filter on most front-load washers is behind a small access panel at the bottom front of the machine. Place a shallow dish or towels on the floor underneath. Slowly unscrew the filter cap — water will drain out. Pull out the filter and rinse it under running water, using a brush to remove lint, debris, coins, and hair. Reinsert and tighten the cap firmly. This should be done every 2 to 3 months, or whenever you notice slower draining or odour.

Is washing machine smell harmful?

The musty or sour smell from a washing machine is caused by mould and bacteria, which can transfer to your clothes. For most people this is an inconvenience rather than a serious health risk. However, people with mould sensitivities, allergies, or respiratory conditions may react to clothing washed in a contaminated machine. A persistent burning smell is more serious — that indicates an electrical or mechanical fault and the machine should not be used until inspected.

How often should I run a cleaning cycle on my washing machine?

Once a month is the standard recommendation for most households. If you do laundry daily, live in a humid climate (Halifax qualifies), or have had odour problems before, every 2 to 3 weeks is better. Use a dedicated washing machine cleaner tablet or a cup of white vinegar plus half a cup of baking soda on the hottest cycle available with no clothes in the drum.

Related Posts

Dishwasher Not Draining? 7 Causes and Fixes

Step-by-step troubleshooting for all brands

Appliance Repair Cost Guide — Halifax 2025

What to expect to pay for washer and dryer repairs

How to Prepare Your Appliances Before a Halifax Winter Storm

House with snowflakes and appliances prepared for winter

When Environment Canada issues a winter storm warning for Halifax, most people think about bread, milk, and batteries. But spending 10 minutes preparing your appliances before the storm hits can save you hundreds of dollars in repairs and prevent significant food waste. Here is what to do.

The Fridge and Freezer

Your fridge and freezer are the most vulnerable appliances during a power outage because they contain perishable food and need continuous power to function.

Pro tip: Place a coin on top of a cup of frozen water in the freezer before the storm. If you come home after an extended outage and the coin has sunk to the bottom, the freezer fully thawed and refroze while you were away. Throw out the food — you cannot visually tell if it was compromised.
  • Turn the fridge and freezer to their coldest settings — this gives you a head start if power goes out; the colder they are when the outage begins, the longer food stays safe
  • Fill empty freezer space — freeze water bottles, bags of ice, or even wet towels; a full freezer holds cold for up to 48 hours, a half-full one only 24
  • Move important items to the freezer — raw meat and dairy you will not eat in the next 4 hours are safer in the freezer during an outage
  • Have a thermometer in both sections — when power returns, you can verify the fridge stayed below 4°C before trusting the food

The Washer and Dryer

  • Run any laundry you need done before the storm — a wet load stuck in the washer during a 2-day outage will develop mould and odour
  • If a load is in the washer when power goes out — add a cup of white vinegar to prevent mildew; run the cycle again when power returns
  • Clean your dryer lint trap and vent — after the storm you will likely have a backlog of laundry; a clean vent means faster drying and lower fire risk

Protect Against Power Surges

Did you know? The biggest risk to your appliances during a storm is not the outage itself — it is the power surge when electricity is restored. A voltage spike when NS Power restores your street can fry control boards, compressor relays, and digital displays worth $200 to $400 each. Unplugging non-essential appliances before the storm is the easiest protection.
  • Unplug non-essential appliances before the storm — dishwasher, microwave, oven, washer, dryer, and any smart appliances
  • Leave the fridge plugged in (with a surge protector if possible) so it restarts automatically
  • When power returns, wait 5 to 10 minutes before plugging things back in — power can spike and dip as the grid stabilizes
  • Consider a whole-home surge protector if you do not already have one — installed at the breaker panel for $200 to $500, it protects every appliance in the house

Water Lines and Pipes

If you lose heat during an extended outage, frozen pipes become a real risk — including the water line to your fridge’s ice maker and water dispenser.

  • Know where your main water shut-off valve is — if pipes freeze, you need to shut water off quickly to prevent flooding when they thaw
  • If your home drops below 0°C inside — turn off the water supply to the fridge and disconnect the line if accessible; a burst fridge water line can cause serious water damage
  • Open cabinet doors under the kitchen sink — allows warm air to circulate around pipes connected to the dishwasher

Post-Storm Appliance Checklist

Once power is back and stable, run through this checklist before relying on any appliance:

  1. Check the fridge temperature — if above 4°C and food has been warm for more than 2 hours, discard perishable items per Health Canada guidelines
  2. Listen to the fridge — if the compressor is clicking but not running, the start relay may need replacing
  3. Run the dishwasher empty on a hot cycle — flushes any stagnant water from the pump and lines
  4. Check all appliances for error codes — try unplugging for 10 minutes to reset; persistent codes may need professional clearing
  5. Run the washer on a clean cycle — hot water with a cup of vinegar clears any odour from water sitting in the drum
  6. Test the oven and stove burners — confirm they are heating normally before you need to cook a full meal

Storm Damage to Your Appliances? We Are Ready.

Same-day service for post-storm surge damage, compressor failures, and error codes. All brands, all of HRM.

Book a Technician

or call (902) 904-5559

Frequently Asked Questions

How do I prepare my fridge for a Halifax winter storm?

Before the storm: turn the fridge and freezer to their coldest settings, fill empty freezer space with water bottles or bags of ice, move perishables you will not eat soon into the freezer, and place a coin on top of a cup of frozen water as a thaw indicator. Also unplug the dishwasher, washer, dryer, and microwave to protect them from the surge when power returns — leave the fridge plugged in so it restarts automatically.

How long does a freezer stay cold during a Nova Scotia power outage?

A full freezer stays cold for approximately 48 hours with the door closed. A half-full freezer holds for about 24 hours. Filling empty space with frozen water bottles before the storm significantly extends this — the additional thermal mass slows temperature rise. Keep the door closed as much as possible; each opening lets warm air in and shortens the safe window.

Should I leave my fridge plugged in during a storm?

Yes — leave the fridge and freezer plugged in so they restart automatically when power returns. If you have a surge protector for the fridge outlet, use it. The main risk is the power surge when NS Power restores your street, which can damage the compressor relay or control board. If you do not have surge protection, unplugging just before expected power restoration and plugging back in 5 minutes after power is stable is the safest approach.

What do I do if my appliance has an error code after a storm?

First, try a reset: unplug the appliance for 10 minutes, then plug it back in. Many post-outage error codes are temporary faults stored by the control board during the power event and clear with a reset. If the error code persists after a reset, the control board may have been damaged by the surge and needs professional diagnosis. Call Max Appliance Repair at (902) 904-5559 — we handle post-storm surge damage across all of HRM.

Can frozen pipes damage my dishwasher or fridge?

Yes. If your home loses heat during an extended outage and interior temperatures drop below 0°C, the water supply line to your fridge (ice maker/water dispenser) and the water inlet valve on your dishwasher can freeze and burst. If you expect the home to get very cold, turn off and disconnect the water supply to both appliances. The water inlet valve on a dishwasher costs $80 to $150 to replace — a cheap repair compared to the water damage a burst line can cause.

Related Posts

Appliances During a Power Outage — What to Know

Food safety, what to unplug, and what to do when power returns

Appliance Repair Cost Guide — Halifax 2025

What to expect to pay for common repairs in Nova Scotia

Is It Safe to Use Appliances During a Nova Scotia Power Outage?

Dark house with appliance outlines during power outage

If you live in Halifax or anywhere in Nova Scotia, you know power outages are not a matter of if — they are a matter of when. Winter storms, hurricanes, and summer thunderstorms can knock out power for hours or days. When the lights go out, here is what you need to know to keep your food safe, avoid expensive damage, and protect your appliances.

How Long Will Food Stay Safe in Your Fridge During an Outage?

Did you know? According to Health Canada, a closed refrigerator keeps food safe for approximately 4 hours during an outage. A full freezer holds for 48 hours; a half-full freezer for 24 hours. The key word is closed — every time you open the door, you lose hours of safe temperature.
  • Refrigerator (closed): Food stays safe for approximately 4 hours
  • Full freezer (closed): Food stays frozen for approximately 48 hours
  • Half-full freezer (closed): Food stays frozen for approximately 24 hours

To maximize cold retention: keep both doors closed, group frozen items together so they insulate each other, and place bags of ice or frozen water bottles in the fridge section if the outage extends past 3 hours. A full freezer holds cold much longer than an empty one — another reason to keep it stocked through Nova Scotia storm season.

Should You Unplug Appliances During a Power Outage?

Yes — unplug most appliances during the outage. When power is restored after a Nova Scotia storm, it often comes back with a voltage surge. This spike can damage the sensitive electronics in modern appliances — control boards, digital displays, compressor inverters, and touchpads are all vulnerable. A single surge can destroy a $200 to $400 control board in your dishwasher, oven, or refrigerator.

What to Unplug

  • Dishwasher
  • Washer and dryer
  • Microwave
  • Electric oven and range
  • TVs, computers, gaming systems
  • Any smart appliance with Wi-Fi connectivity

What to Leave Plugged In

  • Refrigerator and freezer — you want these to restart automatically when power returns. Use a surge protector if you have one. If the outage is expected to last many hours, unplugging and manually restarting after power is stable is the safest approach.
  • Sump pump — needs to restart automatically to prevent basement flooding in a Nova Scotia storm

What to Do When Power Comes Back On

Pro tip: Wait 5 to 10 minutes after power returns before plugging appliances back in — the grid can fluctuate and spike in the first few minutes after restoration. Plug in one appliance at a time rather than everything at once, which can overload your home’s circuits.
  1. Wait 5 to 10 minutes before plugging appliances back in
  2. Plug in one appliance at a time — start with the fridge and freezer
  3. Check your fridge temperature — if above 4°C and food has been warm for more than 2 hours, discard perishables
  4. Listen for unusual sounds — repeated clicking from the fridge compressor may indicate the start relay was damaged by the surge
  5. Check for error codes — most can be cleared by unplugging for 10 minutes; persistent codes need professional diagnosis

Surge Protectors: Are They Worth It for Appliances?

  • Standard power bars do not protect large appliances — your fridge, washer, and dryer draw too much current for a basic power bar
  • Whole-home surge protectors are the best solution — installed at your electrical panel by an electrician, they protect everything in the house. Cost: $200 to $500 installed.
  • Individual appliance surge protectors exist for fridges and washers (rated 15 to 20 amps). They cost $50 to $100 and plug in between the outlet and the appliance.

Given that a single surge can destroy a $300 control board in your Samsung fridge or LG washer, a whole-home surge protector is a smart investment for any Nova Scotia home.

Can a Power Outage Permanently Damage an Appliance?

Unfortunately, yes. The most common post-outage damage we see in Halifax:

  • Fridge compressor failure — the surge damages the start relay or overload protector, preventing the compressor from starting
  • Control board failure — the electronic brain of the appliance gets fried; common in dishwashers, ovens, and smart fridges
  • Error codes that will not clear — the board stores a fault from the power event and needs professional resetting or replacement
  • Washer motor damage — less common but can happen with severe surges

If your appliance is not working properly after a power outage, do not wait — the issue is unlikely to resolve itself and can worsen over time.

Generator Safety and Appliances

  • Never run a generator indoors or in an attached garage — carbon monoxide poisoning is lethal and silent
  • Do not plug your fridge into a generator that produces dirty power — cheap generators can produce voltage fluctuations that damage inverter compressors. Look for generators with less than 5% THD (Total Harmonic Distortion)
  • Do not overload your generator — a fridge needs 1,200 to 2,000 watts to start up even though it only runs at 100 to 200 watts; make sure your generator can handle the startup load

Appliance Acting Up After a Power Outage?

Same-day diagnosis for surge-damaged appliances across Halifax, Dartmouth, Bedford, and HRM.

Book a Technician

or call (902) 904-5559

Frequently Asked Questions

How long can a fridge keep food cold without power?

A closed refrigerator keeps food safe for approximately 4 hours after a power outage. A full freezer maintains safe temperatures for about 48 hours; a half-full freezer for around 24 hours. The single most important thing you can do is keep the doors closed — every opening costs you significant cold retention time. If the outage extends past 4 hours, move perishables from the fridge to the freezer where possible.

Should I unplug my fridge during a power outage?

It is generally safer to leave the fridge plugged in (ideally on a surge protector) so it restarts automatically when power returns. If you know the outage will be very long, unplugging and manually restarting once power is stable for a few minutes is the safest approach. The bigger risk is leaving it plugged in without surge protection and having the power spike when it returns — that surge can damage the compressor relay or control board.

What appliances should I unplug during a Nova Scotia storm?

Unplug your dishwasher, washer, dryer, microwave, oven, TVs, computers, and any smart appliances with Wi-Fi connectivity. Leave the fridge, freezer, and sump pump plugged in. When power returns, wait 5 to 10 minutes before plugging other appliances back in one at a time to avoid overloading circuits and to let the grid stabilize.

My fridge stopped working after a power outage — what happened?

The most common cause is a damaged start relay — a small component that helps the compressor start. A voltage surge when power returned can damage it, leaving the compressor unable to start. You will hear a click every few minutes as the fridge tries to start the compressor. Another possibility is a fried control board. Both are repairable. Call Max Appliance Repair at (902) 904-5559 for same-day diagnosis.

Is a whole-home surge protector worth it in Nova Scotia?

Yes, for most Nova Scotia homeowners. The province sees regular storm-related outages that often cause voltage spikes when power is restored. A whole-home surge protector installed at your electrical panel costs $200 to $500 and protects every appliance in the house. Given that a single surge can destroy a $300 to $400 control board in a modern fridge, dishwasher, or smart oven, a whole-home protector typically pays for itself after just one storm event.

Related Posts

How to Prepare Your Appliances Before a Halifax Winter Storm

Pre-storm checklist to protect food and avoid costly damage

Samsung Fridge Not Cooling?

Includes error codes common after power interruptions

How Long Should a Refrigerator Last? Average Lifespan by Brand

Illustrated refrigerator with clock showing average lifespan

Your fridge is probably the hardest-working appliance in your home — running 24 hours a day, 365 days a year, keeping your food safe. But how long should it actually last before it is time to replace it? The short answer: 10 to 20 years, depending on the brand, model type, and how well you maintain it. The differences between brands are significant.

Average Refrigerator Lifespan by Brand

Based on industry data, manufacturer claims, and what we see in the field repairing fridges across Halifax every day:

Premium Brands (15 to 20+ years)

  • Sub-Zero: 17 to 25 years — built with dual compressors and commercial-grade components designed for decades of use
  • Miele: 15 to 20 years — German-engineered to last 20 years at 5 uses per week
  • Thermador: 15 to 20 years — professional-grade build quality
  • Viking: 15 to 20 years — commercial-style construction

Mid-Range Brands (12 to 17 years)

  • KitchenAid: 12 to 17 years — solid build, shares Whirlpool reliability with better components
  • Bosch: 13 to 17 years — German engineering with excellent long-term reliability
  • GE: 12 to 16 years — widely available parts make repair easy and extend useful life
  • Whirlpool: 12 to 15 years — workhorse brand with excellent parts availability
  • Maytag: 12 to 15 years — built by Whirlpool with a heavy-duty reputation

Consumer Brands (8 to 13 years)

Did you know? We have repaired 25-year-old Whirlpool fridges that just needed a new thermostat, and 3-year-old Samsung fridges with compressor failures. Brand averages are meaningful, but individual units can vary widely. Maintenance habits often matter more than the brand name on the door.
  • Samsung: 10 to 14 years — innovative features but more electronics that can fail
  • LG: 10 to 14 years — reliable linear compressors but complex control boards
  • Frigidaire: 10 to 13 years — affordable and dependable for the price point
  • Kenmore: 10 to 14 years — varies because different models are built by different manufacturers
  • Amana: 10 to 12 years — budget-friendly, simpler designs that are easy to repair

What Type of Fridge Lasts the Longest?

The style of refrigerator matters almost as much as the brand:

Fridge Style Expected Lifespan Notes
Top-freezer 14 to 18 years Simplest design, fewest failure points
Side-by-side 12 to 16 years More complex but generally reliable
Bottom-freezer 12 to 15 years Slightly more prone to ice maker and drawer rail issues
French door 10 to 15 years Most popular but more complex — dual evaporators, ice/water systems, more door seals
Built-in / column 15 to 25 years Premium build quality designed for longevity

The general rule: more features = more things that can fail. A basic top-freezer fridge with no ice maker or water dispenser has fewer failure points than a French door model with a through-the-door ice/water system, smart display, and dual cooling zones.

5 Things That Shorten Your Fridge’s Lifespan

  1. Never cleaning the condenser coils — dirty coils force the compressor to overwork, which is the leading cause of premature compressor failure
  2. Overloading the fridge — blocking air vents with too much food makes the cooling system work harder
  3. Ignoring worn door gaskets — warm air leaking in constantly strains the compressor
  4. Placing the fridge near heat sources — next to the oven, in direct sunlight, or in a hot garage
  5. Ignoring small problems — a small clicking noise today can become a dead compressor next month

5 Things That Extend Your Fridge’s Lifespan

Pro tip: Clean your condenser coils twice a year — vacuum the dust off the coils at the back or bottom of the fridge. This single maintenance task is the most impactful thing you can do to extend compressor life and lower your electricity bill. Homes with pets should do it every 3 to 4 months.
  1. Clean condenser coils twice a year — vacuum the dust off the coils at the back or bottom of the fridge
  2. Check and clean door seals regularly — wipe them with soapy water and check for cracks or stiffness
  3. Keep it 2/3 full — enough thermal mass to retain cold, not so full that airflow is blocked
  4. Set the right temperature — 3°C for the fridge, -18°C for the freezer
  5. Address repairs promptly — a $150 fan motor replacement today prevents a $500 compressor failure later

When to Repair vs When to Replace

Use the 50% rule:

  • If the repair costs less than 50% of a new fridge and the unit is under 12 years old — repair
  • If the repair is over 50% and the fridge is 12 or more years old — consider replacing
  • Exception: Premium brands (Sub-Zero, Miele, Viking) are almost always worth repairing given their 20-plus year design life and $5,000 to $15,000 replacement cost

With appliance prices rising in Canada, repair is increasingly the smarter financial choice for most households. Our technicians will give you an honest recommendation based on the repair cost versus the remaining useful life of your specific unit.

Fridge Not Performing Like It Used To?

Same-day fridge repair across Halifax, Dartmouth, Bedford, and HRM. All brands serviced.

Book a Technician

or call (902) 904-5559

Frequently Asked Questions

How long does a refrigerator last on average?

The average refrigerator lasts 10 to 18 years depending on the brand and type. Premium brands like Sub-Zero and Miele are designed for 15 to 20+ years. Consumer brands like Samsung and LG typically last 10 to 14 years. The style matters too: a simple top-freezer fridge tends to outlast a French door model because it has fewer complex components that can fail.

Which refrigerator brand lasts the longest?

For longevity, Sub-Zero and Miele consistently lead the pack — both are designed and tested for 20+ years of use. Bosch, KitchenAid, and Whirlpool are strong mid-range performers at 12 to 17 years. Samsung and LG produce innovative, feature-rich fridges but tend to have more electronic components that can fail. The longest-lasting fridge in any brand tier is the one with the simplest feature set — fewer electronic systems means fewer potential failure points.

Is it worth repairing a refrigerator that is 10 years old?

In most cases, yes. A 10-year-old fridge from a reputable brand still has 4 to 8 years of life ahead of it. If the repair is a common part like a fan motor, thermostat, defrost heater, or door gasket — typically $150 to $300 — repair is almost always the better financial choice versus buying a new fridge at $800 to $1,500+. The exception is a compressor failure on an older, lower-end fridge, where repair cost may approach or exceed replacement value.

What is the most common reason refrigerators fail prematurely?

Dirty condenser coils are the leading preventable cause of premature refrigerator failure. When coils are coated in dust and pet hair, the compressor cannot dissipate heat efficiently and runs at elevated temperatures continuously. Over months and years, this heat stress causes the compressor to fail — an $400 to $800 repair that could have been prevented with a 15-minute cleaning twice a year.

How do I know if my fridge needs repair or replacement?

Use the 50% rule: if the repair costs less than 50% of a comparable new fridge and the unit is under 12 years old, repair is the better choice. If the fridge is 12 or more years old and facing a major repair like a compressor replacement, the calculation gets closer. Our technicians at Max Appliance Repair Halifax will give you an honest cost-benefit assessment during the diagnostic visit. Call (902) 904-5559 to book.

Related Posts

What Happens If You Never Clean Your Fridge Coils?

The 4-stage breakdown from higher bills to compressor failure

Samsung Fridge Not Cooling?

Troubleshooting guide with error codes and repair costs

Gas vs Electric Dryer: Which Makes More Sense for Halifax Homes?

Gas flame versus electric plug comparison for dryers

If you are buying a new dryer or replacing a broken one, you have probably seen both gas and electric models on the shelf. In some parts of Canada, gas dryers are common. But in Halifax and most of Nova Scotia, the picture is different — and the right choice depends more on your home’s setup than on personal preference.

The Quick Answer for Halifax

Most Halifax homes use electric dryers — and for good reason. Natural gas infrastructure in Nova Scotia is more limited than in provinces like Ontario or Alberta. Many Halifax homes, especially older ones, simply do not have a gas hookup in the laundry area. If you do not already have gas plumbing near your dryer, electric is the practical choice. That said, if your home does have gas available (some newer developments and converted homes do), a gas dryer is worth considering.

Running Cost Comparison

Did you know? Gas dryers are generally cheaper to run per load — but the savings in Nova Scotia are smaller than in provinces with lower electricity rates. At NS Power’s rate of 18.2 cents per kWh, a gas dryer saves roughly $50 to $80 per year over electric. At 5 loads per week, that payback math matters a lot when deciding whether to run a new gas line.
Dryer Type Cost Per Load Annual Cost (5 loads/wk)
Electric (standard) $0.45 to $0.75 $120 to $195
Gas $0.25 to $0.45 $65 to $120
Heat pump electric $0.20 to $0.40 $55 to $105

Based on Nova Scotia Power’s rate of approximately 18.2 cents per kWh. Gas costs estimated at current NS natural gas rates.

Upfront Cost Comparison

  • Electric dryer: $500 to $1,200 depending on brand and features
  • Gas dryer: $550 to $1,300 — typically $50 to $100 more than the equivalent electric model
  • Gas installation (no existing hookup): $500 to $2,000+ for gas line extension, venting, and permits

If you already have a gas hookup, the payback period for a gas dryer is roughly 1 to 2 years. If you need to install a gas line from scratch, it could take 5 to 10 years or more to recoup the installation cost through energy savings alone.

Drying Performance

Gas dryers heat up faster and generally dry clothes slightly quicker than electric models. The heat is also more moist (a byproduct of gas combustion), which some people say results in softer fabrics and fewer wrinkles. Modern electric dryers with heat pump technology are narrowing this gap significantly — heat pump dryers use 40 to 50% less electricity than conventional electric models, though they take longer per cycle and cost more upfront ($900 to $1,500).

Safety Considerations

Pro tip: Lint buildup in the vent hose is the leading cause of dryer fires — and it applies equally to gas and electric models. Clean the lint trap after every load, and have the vent duct professionally cleaned or inspected once a year. A clogged vent also forces the dryer to run longer, adding to your electricity or gas costs.

Gas dryers produce combustion byproducts including carbon monoxide and require proper ventilation. A gas leak or faulty connection is a serious safety hazard — annual inspection is recommended. Electric dryers do not produce combustion gases, but lint fires remain a risk for both types if the vent is clogged. Dryer vent maintenance is critical regardless of fuel type.

Repair and Maintenance

Electric dryers are generally simpler to repair because they have fewer components — no gas valve, no igniter, no burner assembly. Parts are also more widely available in Nova Scotia since electric dryers dominate the market here. Gas dryer repairs require a technician comfortable working with gas connections, and not all repair companies service gas appliances in HRM. Typical repair costs for both types fall in the $125 to $325 range for common issues like heating elements, thermal fuses, and belt replacements.

What About Ventless and Heat Pump Dryers?

A third option worth considering: ventless heat pump dryers. These are fully electric, do not need an exhaust vent, and use significantly less energy. They are ideal for Halifax condos and apartments where exterior venting is not possible. The trade-off: they cost more upfront, take longer to dry, and can be more expensive to repair. Brands like Bosch, Miele, and LG offer popular heat pump models.

The Bottom Line for Halifax

  • No existing gas hookup? Go electric. The installation cost for gas does not justify the annual savings.
  • Already have gas in your laundry area? A gas dryer will save you $50 to $80 per year and dry slightly faster.
  • In a condo with no exterior vent? A ventless heat pump dryer is your best option.
  • Want the lowest long-term energy cost? A heat pump electric dryer wins, despite the higher upfront price.

Dryer Not Heating or Taking Too Long? We Fix All Types.

Gas, electric, or heat pump — same-day service across Halifax, Dartmouth, Bedford, and HRM.

Book a Technician

or call (902) 904-5559

Frequently Asked Questions

Are gas dryers available in Halifax?

Yes, gas dryers are sold and available in Halifax, but they are far less common than electric models. Natural gas availability in Nova Scotia is more limited than in provinces like Ontario or Alberta, and many Halifax homes — particularly older ones — do not have a gas line in the laundry area. If your home already has gas service and a connection near the laundry space, a gas dryer is a practical option. If not, the cost of running a new gas line ($500 to $2,000+) makes electric the better choice.

How much does it cost to run an electric dryer in Nova Scotia?

At Nova Scotia Power’s current rate of approximately 18.2 cents per kWh, each dryer cycle costs roughly $0.45 to $0.75 depending on the load size and cycle length. At 5 loads per week, that adds up to approximately $120 to $195 per year. A heat pump dryer cuts this in half — roughly $55 to $105 per year — at the cost of longer cycle times and a higher purchase price.

Can I convert my electric dryer to gas?

Not practically — electric and gas dryers have fundamentally different internal components (heating element vs burner/igniter assembly) and cannot be converted. If you want to switch to gas, you need to buy a new gas dryer and have a licensed gas fitter run a gas line and connect it. The dryer itself costs a similar amount, but the installation adds $500 to $2,000+ depending on how far the gas line needs to run.

What is a heat pump dryer and is it worth it in Halifax?

A heat pump dryer uses the same refrigerant-based technology as an air conditioner to dry clothes, using 40 to 50% less electricity than a conventional electric dryer. At NS Power rates, this can save $60 to $90 per year. The downsides: they cost $900 to $1,500 upfront, dry slower, and are more expensive to repair. For a household doing 5 or more loads per week, the payback period is roughly 5 to 8 years. They are also the ideal solution for condos and apartments without exterior vent access.

How do I know if my dryer vent needs cleaning?

Signs your dryer vent is clogged include: clothes taking more than one cycle to fully dry, the dryer exterior feeling very hot during operation, a burning or musty smell during drying, or lint accumulating around the outside vent flap. A clogged vent forces the dryer to run longer per cycle, increases energy costs, and is a fire hazard. The vent should be cleaned at least once a year — more often if you do laundry daily. Max Appliance Repair Halifax can clean and inspect dryer vents as part of a service visit.

Related Posts

Can You Stack Any Washer and Dryer Together?

What Halifax condo owners need to know about stacking kits

Phantom Power Explained

What standby power costs you on your NS Power bill